<?xml version="1.0" encoding="utf-8"?>
<feed xmlns="http://www.w3.org/2005/Atom">
  <title>夏大鱼羊</title>
  
  
  <link href="https://xkwxdyy.github.io/atom.xml" rel="self"/>
  
  <link href="https://xkwxdyy.github.io/"/>
  <updated>2022-01-15T03:33:00.000Z</updated>
  <id>https://xkwxdyy.github.io/</id>
  
  <author>
    <name>Kangwei Xia</name>
    
  </author>
  
  <generator uri="https://hexo.io/">Hexo</generator>
  
  <entry>
    <title>实现chapter内多个enumerate环境连续编号并在新chapter重置</title>
    <link href="https://xkwxdyy.github.io/2022/01/14/enumerate-continume-numbering-within-chapter/"/>
    <id>https://xkwxdyy.github.io/2022/01/14/enumerate-continume-numbering-within-chapter/</id>
    <published>2022-01-14T13:28:52.000Z</published>
    <updated>2022-01-15T03:33:00.000Z</updated>
    
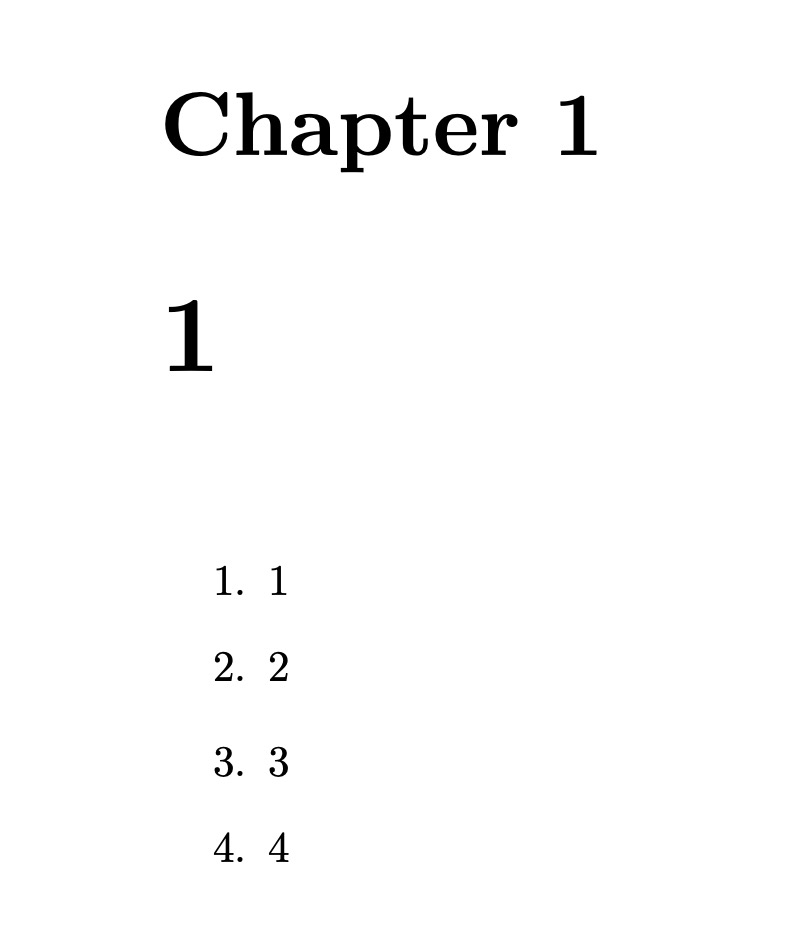
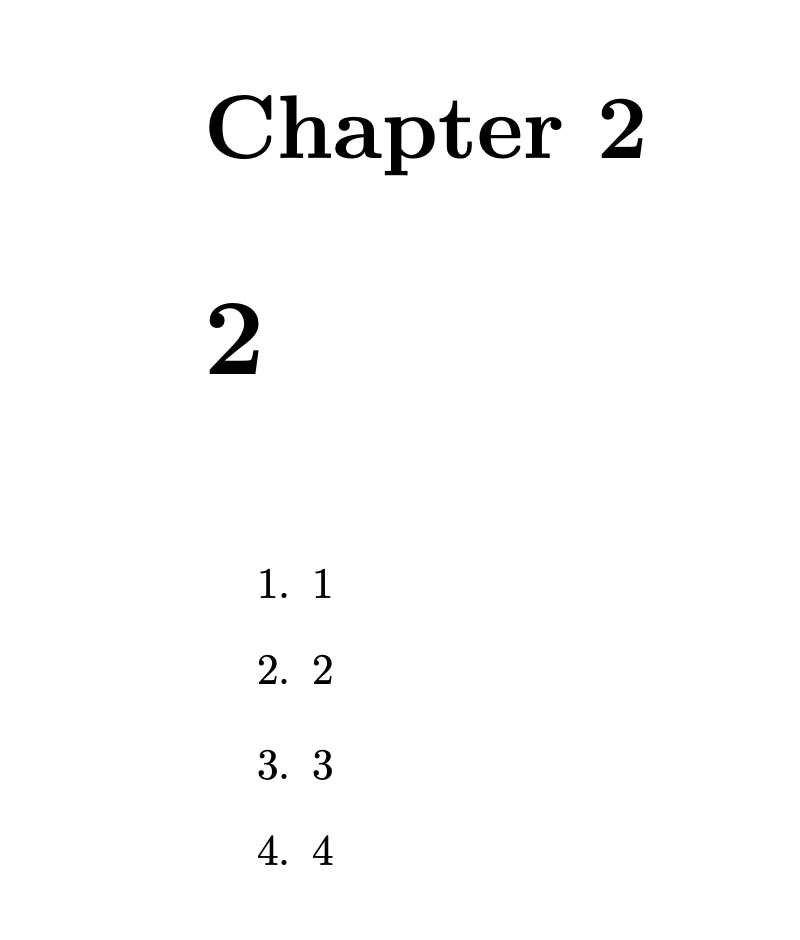
    <content type="html"><![CDATA[<h2 id="问题阐述">问题阐述</h2><p>昨天群内万宏伟老师提出了一个需求：想要enumerate具有以下功能：</p><ol type="1"><li>一个chapter内的不同的enumerate环境可以连续编号</li><li>在新的chapter的开始，enumerate环境会重置计数器</li></ol><p>起因是他想一个chapter是一份试卷，每一份试卷都是从1开始编号，问题很容易理解</p><p>群里有老师说要重设计数器，我个人并不想要这种做法，理由如下：</p><ul><li>重设计数器之后要怎么做？重新做一个list出来？</li><li><code>enumitem</code>宏包对<code>enumerate</code>环境这么好的增幅效果，这么好的轮子就不能用了</li></ul><p>所以基本实现的想法是去修改<code>enumerate</code>环境的定义，具体实现如下：</p><h2 id="实现的思路分析">实现的思路分析</h2><h3 id="功能1的实现">功能1的实现</h3><p>连续编号这个功能早在<code>enumitem</code>宏包的<code>resume*</code>键（带星号的会继承<code>label</code>的样式，不带星号的只继承计数器的值，考虑到一半都会修改<code>label</code>，所以采用了带星的）就可以实现，但是喜欢偷懒的我不想要每次都要输入<code>resume*</code>，如果把<code>enumerate</code>改成自己本身自带<code>resume*</code>选项不就行了？</p><p>但是直接<code>renew</code>的话，可是我们不知道enumerate本身咋定义的，难道还要去翻过来并且重新去弄list？那也太麻烦了，而且我们也不是改定义，只是想让</p><figure class="highlight tex"><table><tr><td class="gutter"><div class="code-wrapper"><pre><span class="line">1</span><br><span class="line">2</span><br><span class="line">3</span><br></pre></div></td><td class="code"><pre><code class="hljs tex"><span class="hljs-keyword">\begin</span>&#123;enumerate&#125;<br><br><span class="hljs-keyword">\end</span>&#123;enumerate&#125;<br></code></pre></td></tr></table></figure><p>具有</p><figure class="highlight tex"><table><tr><td class="gutter"><pre><span class="line">1</span><br><span class="line">2</span><br><span class="line">3</span><br></pre></td><td class="code"><pre><code class="hljs tex"><span class="hljs-keyword">\begin</span>&#123;enumerate&#125;[resume*]<br><br><span class="hljs-keyword">\end</span>&#123;enumerate&#125;<br></code></pre></td></tr></table></figure><p>的效果，这咋搞？</p><p>我们重新看我们的需求，其实我们并不是要修改<code>enumerate</code>本身的定义，而是要在它之上加点东西而已。</p><p>这个时候，我想到了以前看乙醇哥的一篇博客《<a href="https://syvshc.github.io/2021-11-10-compute-total-items/">统计一节中的列表项数量</a>》里面有一个做法我印象深刻：复制副本，简单来说就是</p><ol type="1"><li><p>先把命令<code>\foo</code>复制一个副本<code>\fooo</code>出来，也就是把定义放到一个新的命令里去，怎么定义的我不关心，我只知道我把它已经存起来了，随时可以被调用</p></li><li><p>用<code>\def</code>修改原命令</p><figure class="highlight tex"><table><tr><td class="gutter"><pre><span class="line">1</span><br><span class="line">2</span><br><span class="line">3</span><br><span class="line">4</span><br></pre></td><td class="code"><pre><code class="hljs tex"><span class="hljs-keyword">\def</span><span class="hljs-keyword">\foo</span>&#123;<br>  <span class="hljs-comment">% something you want to add</span><br>  <span class="hljs-keyword">\fooo</span><br>&#125;<br></code></pre></td></tr></table></figure><p>由于<code>\fooo</code>和<code>\foo</code>是等效的，所以就是我们在原来的基础上加了东西，这个做法有迭代的味道在里面，也有数学或物理里的“看作整体”想法在。</p></li></ol><p>但是这个地方我们是环境怎么办？那我们只需粗略但不严谨地知道，一般环境<code>foo</code>的定义其实是定义了两个宏<code>\foo</code>和<code>\endfoo</code>，那我分别储存这两个宏的副本就行。</p><div class="note note-warning">            <p>PS： 虽然不属于本文的讨论范围，但是还是插一嘴，从上面的这个可以看出，其实传统方式定义<code>foo</code>环境的话其实定义了<code>\foo</code>命令，但是如果我想<code>newcommand</code>定义<code>\foo</code>的话就会报错冲突（不出意外是<code>already-defined</code>类型的），那如果我还是想要<code>\foo</code>和<code>foo</code>环境共存怎么办？这个时候要用<code>xparse</code>宏包的<code>\NewDocumentEnvironment</code>命令来定义环境了，这样就可以共存，详细请参看这篇文章：<a href="https://www.texdev.net/2011/01/09/latex3-and-document-environments/">LaTeX3 and document environments</a></p><p>（所以说<code>xparse</code>宏包牛！这个宏包的一些定义命令的效果和方式真是颠覆我传统的想法，第一次看就惊呼牛皮）</p>          </div><p>加上一点点小细节就变成了下面的代码：</p><figure class="highlight tex"><table><tr><td class="gutter"><pre><span class="line">1</span><br><span class="line">2</span><br><span class="line">3</span><br><span class="line">4</span><br><span class="line">5</span><br><span class="line">6</span><br><span class="line">7</span><br><span class="line">8</span><br><span class="line">9</span><br><span class="line">10</span><br><span class="line">11</span><br><span class="line">12</span><br><span class="line">13</span><br><span class="line">14</span><br><span class="line">15</span><br><span class="line">16</span><br><span class="line">17</span><br><span class="line">18</span><br><span class="line">19</span><br><span class="line">20</span><br></pre></td><td class="code"><pre><code class="hljs tex"><span class="hljs-keyword">\ExplSyntaxOn</span><br><span class="hljs-keyword">\makeatletter</span><br><span class="hljs-comment">% 储存副本代码</span><br><span class="hljs-keyword">\let</span><span class="hljs-keyword">\@enumerate</span><span class="hljs-keyword">\enumerate</span><br><span class="hljs-keyword">\let</span><span class="hljs-keyword">\@endenumerate</span><span class="hljs-keyword">\endenumerate</span><br><span class="hljs-comment">% 重定义enumerate环境</span><br><span class="hljs-keyword">\RenewDocumentEnvironment</span>&#123;enumerate&#125;&#123; O&#123;&#125; !b &#125;<br>  &#123;<br>  <span class="hljs-comment">% 因为chapter最开始的enumerate环境不需要resume</span><br>  <span class="hljs-comment">% 所以加一个LaTeX3的简单整数判断bool从句</span><br>    <span class="hljs-keyword">\int_compare:nNnTF</span> &#123; <span class="hljs-keyword">\theenumi</span> &#125; = &#123;0&#125;<br>      &#123; <span class="hljs-keyword">\@enumerate</span>[<span class="hljs-params">#1</span>] &#125;<br>      &#123; <span class="hljs-keyword">\@enumerate</span>[resume*, <span class="hljs-params">#1</span>] &#125;<br>      <span class="hljs-params">#2</span><br>  &#125;<br>  &#123;<br>    <span class="hljs-keyword">\@endenumerate</span><br>  &#125;<br><span class="hljs-keyword">\makeatother</span><br><span class="hljs-keyword">\ExplSyntaxOff</span><br></code></pre></td></tr></table></figure><p>PS：<code>xparse</code>宏包的使用我在我的<a href="https://xkwxdyy.github.io/2022/01/08/LaTeX3-learning/">LaTeX3个人学习经验</a>文章里也有呼吁大家去读文档学习，是我在见到<code>hlist</code>环境、TikZ、LaTeX3 后震惊的第四种代码（不经想到作者都是什么神仙怪物，怎么会发明出这么牛的命令）非常推荐大家学习</p><p>功能1其实就已解决了，可以直接使用<code>enumerate</code>环境也获得<code>resume*</code>的效果而不用手动添加</p><h3 id="功能2的实现">功能2的实现</h3><p>代码其实很简单</p><figure class="highlight tex"><table><tr><td class="gutter"><pre><span class="line">1</span><br></pre></td><td class="code"><pre><code class="hljs tex"><span class="hljs-keyword">\setcounter</span>&#123;enumi&#125;&#123;0&#125;<br></code></pre></td></tr></table></figure><p>然后我们的目的就转化为：如何在每个<code>\chapter</code>命令的时候自动加载这个代码？</p><p>也就是能不能把这个代码嵌入<code>\chapter</code>命令里面？</p><p>我们仿照功能1的思路就可以得到下面的代码：</p><figure class="highlight tex"><table><tr><td class="gutter"><pre><span class="line">1</span><br><span class="line">2</span><br><span class="line">3</span><br><span class="line">4</span><br><span class="line">5</span><br></pre></td><td class="code"><pre><code class="hljs tex"><span class="hljs-keyword">\let</span><span class="hljs-keyword">\ch@pter</span><span class="hljs-keyword">\chapter</span><br><span class="hljs-keyword">\def</span><span class="hljs-keyword">\chapter</span>&#123;<br>  <span class="hljs-keyword">\setcounter</span>&#123;enumi&#125;&#123;0&#125;    <span class="hljs-comment">% 注意这个要放在\ch@pter的前面，放在后面会报错，我也不懂TeX，也不知道为啥</span><br>  <span class="hljs-keyword">\ch@pter</span><br>&#125;<br></code></pre></td></tr></table></figure><div class="note note-danger">            <p>特别要注意的是<code>\@chapter</code>这个命令在LaTeX的源代码里就已经被定义了，所以用其它的副本名字就行。</p><p>（别问我怎么知道的... 我就恰巧不巧取了<code>\@chapter</code>，一开始就很纳闷为什么bug了，在乙醇哥的指点下注意到了这个</p>          </div><p>还有一种方法就是用<code>etoolbox</code>宏包的hook命令<code>\pretocmd</code>，和上面一样只能用pre放在前面，而不能用<code>\apptocmd</code>放在后面，希望知道原因的大佬能留言告知下原因</p><figure class="highlight tex"><table><tr><td class="gutter"><pre><span class="line">1</span><br><span class="line">2</span><br></pre></td><td class="code"><pre><code class="hljs tex"><span class="hljs-comment">% \usepackage&#123;etoolbox&#125;</span><br><span class="hljs-keyword">\pretocmd</span>&#123;<span class="hljs-keyword">\chapter</span>&#125;&#123;<span class="hljs-keyword">\setcounter</span>&#123;enumi&#125;&#123;0&#125;&#125;&#123;&#125;&#123;&#125;<br></code></pre></td></tr></table></figure><h3 id="功能2的代码完善">功能2的代码完善</h3><p>上面说到设置计数器的代码只能放在<code>\ch@pter</code>的前面，经过乙醇哥的提醒，发现问题出在：<code>\chapter</code>命令是需要接收参数的，如果像上面那样的方式不做处理直接把设置计数器的代码移到<code>\ch@pter</code>后面的话，<code>\chapter</code>就会自动识别后面的代码为参数，但是本身也不是纯文本的，所以会报错。</p><p>还有一个需要注意的是，我们上面的做法没有考虑到<code>\chapter*</code>，所以现在需要把这个加上。</p><p>知道原因了就好解决了，既然会影响参数设定，那我就提前“把参数喂给<code>\ch@pter</code>”，这样他就不会往后面“找吃的”了。</p><p>用上一点点LaTeX3的cs函数和xparse的s指定（用来处理带*命令），我们便得到了下面的代码：</p><p>（有一个重要的知识：<code>\chapter[]&#123;&#125;</code>与<code>\chapter*&#123;&#125;</code>，也就是带<code>*</code>命令没有可选参数，虽然源代码是定义了两个命令分别控制，但是为了帮助记忆和理解，就相当于这里的<code>*</code>作为了<code>\chapter</code>的可选参数已经被“吃掉了”，就只剩下必选参数）</p><figure class="highlight tex"><table><tr><td class="gutter"><pre><span class="line">1</span><br><span class="line">2</span><br><span class="line">3</span><br><span class="line">4</span><br><span class="line">5</span><br><span class="line">6</span><br><span class="line">7</span><br><span class="line">8</span><br><span class="line">9</span><br><span class="line">10</span><br><span class="line">11</span><br><span class="line">12</span><br><span class="line">13</span><br></pre></td><td class="code"><pre><code class="hljs tex"><span class="hljs-keyword">\cs_set_eq:NN</span> <span class="hljs-keyword">\chapter</span>:nn <span class="hljs-keyword">\chapter</span>    <span class="hljs-comment">% 相当于我们之前的把\chapter复制给\ch@pter一样</span><br><span class="hljs-keyword">\cs_new:Npn</span> <span class="hljs-keyword">\chapter_star:n</span> <span class="hljs-params">#1</span><br>  &#123;<br>    <span class="hljs-keyword">\chapter</span>:nn * &#123;<span class="hljs-params">#1</span>&#125;<br>  &#125;<br><br><span class="hljs-keyword">\RenewDocumentCommand</span>&#123; <span class="hljs-keyword">\chapter</span> &#125;&#123; s O&#123;<span class="hljs-params">#3</span>&#125; m &#125;   <span class="hljs-comment">% 注意#2的默认值是#3，如果为空的话目录和页眉就没有标题了</span><br>  &#123;<br>    <span class="hljs-keyword">\IfBooleanTF</span> &#123;<span class="hljs-params">#1</span>&#125;<br>      &#123; <span class="hljs-keyword">\chapter_star:n</span> &#123;<span class="hljs-params">#3</span>&#125; &#125;<br>      &#123; <span class="hljs-keyword">\chapter</span>:nn [<span class="hljs-params">#2</span>] &#123;<span class="hljs-params">#3</span>&#125; &#125;<br>    <span class="hljs-keyword">\setcounter</span>&#123;enumi&#125;&#123;0&#125;<br>  &#125;<br></code></pre></td></tr></table></figure><p>查一下<code>\chapter</code>定义的源码知道，不能直接通过<code>\apptocmd</code>来直接处理<code>\chapter</code>，因为它不是显式定义的，而是对<code>\@chapter</code>和<code>\@schapter</code>命令的包装，所以如果<code>\apptpcmd</code>到<code>\chapter</code>的尾部的话，代码就会挡住“参数的入口”，反而被误当参数而吃掉了。但是<code>\@chapter</code>和<code>\@schapter</code>是显式定义的（也就是我们通常的<code>\newcommand</code>或<code>\def</code>定义的，对于参数怎么处理我都约定好了，apptocmd到这两个命令的话，就是我们所期待的效果，而且不会挡住“入口”，这样的话<code>\chapter</code>接收到的参数就会根据定义来分配给<code>\@chapter</code>或<code>\@schapter</code>命令。</p><p>之所以放在前面是可行的，是因为设置计数器部分的代码并没有“挡住进食口”，所以原来咋样就咋样。</p><div class="note note-warning">            <p>注意，其实用最初的<code>pretocmd</code>或者<code>\def</code>的方法已经能够实现效果，我之所以要“大费周章”地还要研究把计数器代码放在后面，是因为这本身就是学习的过程，我不是为了完成任务而去处理这段代码，而是希望在写这段代码的过程中也能学到东西，对LaTeX的理解能够更深一点。</p>          </div><h2 id="一个完整的mwe">一个完整的MWE</h2><figure class="highlight tex"><table><tr><td class="gutter"><pre><span class="line">1</span><br><span class="line">2</span><br><span class="line">3</span><br><span class="line">4</span><br><span class="line">5</span><br><span class="line">6</span><br><span class="line">7</span><br><span class="line">8</span><br><span class="line">9</span><br><span class="line">10</span><br><span class="line">11</span><br><span class="line">12</span><br><span class="line">13</span><br><span class="line">14</span><br><span class="line">15</span><br><span class="line">16</span><br><span class="line">17</span><br><span class="line">18</span><br><span class="line">19</span><br><span class="line">20</span><br><span class="line">21</span><br><span class="line">22</span><br><span class="line">23</span><br><span class="line">24</span><br><span class="line">25</span><br><span class="line">26</span><br><span class="line">27</span><br><span class="line">28</span><br><span class="line">29</span><br><span class="line">30</span><br><span class="line">31</span><br><span class="line">32</span><br><span class="line">33</span><br><span class="line">34</span><br><span class="line">35</span><br><span class="line">36</span><br><span class="line">37</span><br><span class="line">38</span><br><span class="line">39</span><br><span class="line">40</span><br><span class="line">41</span><br><span class="line">42</span><br><span class="line">43</span><br><span class="line">44</span><br><span class="line">45</span><br><span class="line">46</span><br><span class="line">47</span><br><span class="line">48</span><br><span class="line">49</span><br><span class="line">50</span><br><span class="line">51</span><br><span class="line">52</span><br><span class="line">53</span><br><span class="line">54</span><br><span class="line">55</span><br><span class="line">56</span><br><span class="line">57</span><br><span class="line">58</span><br><span class="line">59</span><br><span class="line">60</span><br><span class="line">61</span><br><span class="line">62</span><br><span class="line">63</span><br><span class="line">64</span><br><span class="line">65</span><br><span class="line">66</span><br><span class="line">67</span><br><span class="line">68</span><br><span class="line">69</span><br><span class="line">70</span><br><span class="line">71</span><br><span class="line">72</span><br><span class="line">73</span><br><span class="line">74</span><br><span class="line">75</span><br><span class="line">76</span><br></pre></td><td class="code"><pre><code class="hljs tex"><span class="hljs-keyword">\documentclass</span>&#123;book&#125;<br><span class="hljs-keyword">\usepackage</span>&#123;enumitem&#125;<br><span class="hljs-keyword">\usepackage</span>&#123;etoolbox&#125;<br><span class="hljs-keyword">\ExplSyntaxOn</span><br><span class="hljs-keyword">\makeatletter</span><br><span class="hljs-keyword">\let</span><span class="hljs-keyword">\@enumerate</span><span class="hljs-keyword">\enumerate</span><br><span class="hljs-keyword">\let</span><span class="hljs-keyword">\@endenumerate</span><span class="hljs-keyword">\endenumerate</span><br><br><span class="hljs-keyword">\RenewDocumentEnvironment</span>&#123;enumerate&#125;&#123; O&#123;&#125; !b &#125;<br>  &#123;<br>    <span class="hljs-keyword">\int_compare:nNnTF</span> &#123; <span class="hljs-keyword">\theenumi</span> &#125; = &#123;0&#125;<br>      &#123; <span class="hljs-keyword">\@enumerate</span>[<span class="hljs-params">#1</span>] &#125;<br>      &#123; <span class="hljs-keyword">\@enumerate</span>[resume*, <span class="hljs-params">#1</span>] &#125;<br>      <span class="hljs-params">#2</span><br>  &#125;<br>  &#123;<br>    <span class="hljs-keyword">\@endenumerate</span><br>  &#125;<br><br><span class="hljs-comment">% 下面两种方法都行</span><br><span class="hljs-comment">% 第一种是用etoolbox的pretocmd</span><br><span class="hljs-comment">% \pretocmd&#123;\chapter&#125;&#123;\setcounter&#123;enumi&#125;&#123;0&#125;&#125;&#123;&#125;&#123;&#125;</span><br><br><span class="hljs-comment">% 第二种是copy一个副本出来重定义chapter</span><br><span class="hljs-keyword">\let</span><span class="hljs-keyword">\ch@pter</span><span class="hljs-keyword">\chapter</span><br><span class="hljs-keyword">\cs_set_eq:NN</span> <span class="hljs-keyword">\chapter</span>:nn <span class="hljs-keyword">\chapter</span><br><span class="hljs-keyword">\cs_new:Npn</span> <span class="hljs-keyword">\chapter_star:n</span> <span class="hljs-params">#1</span><br>  &#123;<br>    <span class="hljs-keyword">\chapter</span>:nn * &#123;<span class="hljs-params">#1</span>&#125;<br>  &#125;<br><span class="hljs-comment">% \def\chapter&#123;</span><br><span class="hljs-comment">%   \setcounter&#123;enumi&#125;&#123;0&#125;</span><br><span class="hljs-comment">%   \ch@pter</span><br><span class="hljs-comment">% &#125;</span><br><br><span class="hljs-keyword">\RenewDocumentCommand</span>&#123; <span class="hljs-keyword">\chapter</span> &#125;&#123; s O&#123;<span class="hljs-params">#3</span>&#125; m &#125;   <span class="hljs-comment">% 注意#2的默认值是#3，如果为空的话目录和页眉就没有标题了</span><br>  &#123;<br>    <span class="hljs-keyword">\IfBooleanTF</span> &#123;<span class="hljs-params">#1</span>&#125;<br>      &#123; <span class="hljs-keyword">\chapter_star:n</span> &#123;<span class="hljs-params">#3</span>&#125; &#125;<br>      &#123; <span class="hljs-keyword">\chapter</span>:nn [<span class="hljs-params">#2</span>] &#123;<span class="hljs-params">#3</span>&#125; &#125;<br>    <span class="hljs-keyword">\setcounter</span>&#123;enumi&#125;&#123;0&#125;<br>  &#125;<br><span class="hljs-keyword">\makeatother</span><br><span class="hljs-keyword">\ExplSyntaxOff</span><br><br><br><span class="hljs-keyword">\begin</span>&#123;document&#125;<br><br><span class="hljs-keyword">\tableofcontents</span><br><br><span class="hljs-keyword">\chapter</span>&#123;1&#125;<br><br><span class="hljs-keyword">\begin</span>&#123;enumerate&#125;[label = <span class="hljs-keyword">\roman</span>*.]<br>  <span class="hljs-keyword">\item</span> 1<br>  <span class="hljs-keyword">\item</span> 2<br><span class="hljs-keyword">\end</span>&#123;enumerate&#125;<br><br><span class="hljs-keyword">\begin</span>&#123;enumerate&#125;<br>  <span class="hljs-keyword">\item</span> 3<br>  <span class="hljs-keyword">\item</span> 4<br><span class="hljs-keyword">\end</span>&#123;enumerate&#125;<br><br><br><span class="hljs-keyword">\chapter</span>&#123;2&#125;<br><br><span class="hljs-keyword">\begin</span>&#123;enumerate&#125;<br>  <span class="hljs-keyword">\item</span> 1<br>  <span class="hljs-keyword">\item</span> 2<br><span class="hljs-keyword">\end</span>&#123;enumerate&#125;<br><br><span class="hljs-keyword">\begin</span>&#123;enumerate&#125;<br>  <span class="hljs-keyword">\item</span> 3<br>  <span class="hljs-keyword">\item</span> 4<br><span class="hljs-keyword">\end</span>&#123;enumerate&#125;<br><br><span class="hljs-keyword">\end</span>&#123;document&#125;<br></code></pre></td></tr></table></figure><div class="group-image-container"><div class="group-image-row"><div class="group-image-wrap"><img src="https://raw.githubusercontent.com/xkwxdyy/image/main/postimage/image-hosting/enumerate-continume-numbering-within-chapter-MWE1.jpg" /></div><div class="group-image-wrap"><img src="https://raw.githubusercontent.com/xkwxdyy/image/main/postimage/image-hosting/enumerate-continume-numbering-within-chapter-MWE2.jpg" /></div></div></div><h2 id="相关链接">相关链接</h2><p>本文多处是在乙醇哥的帮助下完善的，特此感谢！</p><p>欢迎读者关注他的博客：<a href="https://syvshc.github.io/">无锤乙醇</a>和Github：<a href="https://github.com/syvshc">syvshc</a></p>]]></content>
    
    
    <summary type="html">实现了chapter内的enumerate环境可以连续编号并且enumi计数器在新的chapter会自动清零的效果</summary>


    <category term="LaTeX" scheme="https://xkwxdyy.github.io/categories/LaTeX/"/>
    
    <category term="LaTeX问题解决" scheme="https://xkwxdyy.github.io/categories/LaTeX%E9%97%AE%E9%A2%98%E8%A7%A3%E5%86%B3/"/>
    
    
    <category term="LaTeX" scheme="https://xkwxdyy.github.io/tags/LaTeX/"/>
    
    <category term="问题解决" scheme="https://xkwxdyy.github.io/tags/%E9%97%AE%E9%A2%98%E8%A7%A3%E5%86%B3/"/>
    
    <category term="enumerate" scheme="https://xkwxdyy.github.io/tags/enumerate/"/>
    
  </entry>
  
  <entry>
    <title>个人作品分析：choices宏包</title>
    <link href="https://xkwxdyy.github.io/2022/01/09/choices-sty/"/>
    <id>https://xkwxdyy.github.io/2022/01/09/choices-sty/</id>
    <published>2022-01-09T02:10:03.000Z</published>
    <updated>2022-01-09T05:55:00.000Z</updated>
    
    <content type="html"><![CDATA[<h2 id="宏包介绍">宏包介绍</h2><h3 id="宏包基本情况">宏包基本情况</h3><p>Package: LaTeX package for flexibly LaTeXing choice items based on hlist and LaTeX3.</p><p>Repository: <a href="https://github.com/xkwxdyy/choices-l3">Github仓库</a></p><p>Repository: <a href="https://gitee.com/xkwxdyy/choices-l3">Gitee仓库</a></p><p>Author: Kangwei Xia <a href="mailto:kangweixia_xdyy@163.com">E-mail</a></p><h3 id="宏包说明">宏包说明</h3><p><code>choices</code>宏包是一个用于排版选项的宏包, 包含但不限于以下特点： - 可以排版任意数量的选项 - 可以方便切换标签风格<code>label-style</code> - 可以更改标签<code>label</code>与内容的相对位置 - 可以调整标签<code>label</code>的偏移 - 自动识别是否使用 <code>includegraphics</code> 命令并自行调整 <code>anchor</code> 的位置（仅 <code>choices*</code> 有此功能, 之所以会有 <code>choices*</code> 命令, 就是因为基于 <code>hlist</code> 环境的 <code>choices</code> 只有一个方位, 无法更改, 所以需要用另外的方法处理（ <code>choices*</code> 是用 <code>coffin</code> 进行处理））. <strong>此功能的实现需要将 <code>expl3</code> 宏包更新至最新（至少是2021-11-12后）, 否则可能无法使用且会报错.</strong></p><p>在需要排版选项的情况中（比如试卷、问卷排版等）<code>choices</code>宏包可以发挥重要作用, 旨在让用户更多关注在内容本身, 契合LaTeX的内容与样式分离的思想.</p><p><code>choices</code>宏包是基于<code>hlist</code>环境与LaTeX3开发的LaTeX宏包, 它提供了<code>choices(*)</code> 两个主命令与<code>coffinchoice</code>、<code>hlistchoice</code>和<code>quan</code>三个副命令. <code>choices</code>和<code>choices*</code>是利用了<code>xparse</code>宏包对<code>hlistchoice</code>与<code>coffinchoice</code>命令进行封装. 其中<code>choices</code>等效于<code>hlistchoice</code>, <code>choices*</code>等效于<code>coffinchoice</code>.</p><p>通常情况下使用 <code>choices</code> 命令就够了, 但是用户如果有排版图片的需求, 可能需要将 <code>label</code> 置于内容的上方或下方, 而 <code>choices</code> 命令基于 <code>hlist</code> 环境编写, 所以<code>label</code> 只能置于内容的左侧, 这个时候只需要使用<code>choices*</code>, 会自动更改<code>anchor</code>为<code>south</code>, 如果需要修改自动的<code>anchor</code>为其它的方位可以使用<code>\choicesetup&#123;autopic = north&#125;</code> .</p><p>更多宏包细节与命令欢迎阅读宏包手册<code>choices_usrmanual.pdf</code>（用xelatex编译<code>choices_usrmanual.tex</code>即可）</p><h3 id="如果使用过程中发现了issue或者有什么建议-欢迎提出">如果使用过程中发现了issue或者有什么建议, 欢迎提出</h3><ul><li><a href="https://github.com/xkwxdyy/choices-l3/issues">Github issues</a></li><li><a href="https://gitee.com/xkwxdyy/choices-l3/issues">Gitee issues</a></li></ul><hr /><h2 id="宏包设计和构想思路">宏包设计和构想思路</h2><p>宏包的产生背景我其实在<code>choices_usrmanual.pdf</code>中解释过，在这里简要地再提一下：</p><ul><li>对于选择题的选项排版<ul><li>已有的选项排版命令受限于参数的个数，比如四个参数的命令必须要有四个选项</li><li>对于多选题，问卷的选项排版，选项个数不确定，如果要从1-9个参数都自定义命令那非常麻烦，而且如果按照传统的自定义命令方式最多有9个必选参数，如果有更多的排版需求，那么这些方法已经失效</li><li>已有的命令无法切换label的样式</li></ul></li></ul><p>基于上述的背景，我一开始基于<code>hlist</code>环境整合了一些功能，用LaTeX3的<code>seq</code>模块来切割选项，解决了参数个数问题，产生了<code>\choices</code>命令（本质是<code>\hlistchoice</code>命令）。</p><p>但是<code>\choices</code>命令有一个小问题：label的位置非常局限，即使是上下偏移都无法通过<code>hlist</code>宏包本身来实现，而且还遇到一个问题：图片类型的选项排版。</p><p>图片排版也是中学老师经常碰到的一种问题，我目前了解的情况来看，大部分都是通过表格来完成的，但是“使用表格”本身有一丢丢违背LaTeX的“内容与样式分离”的想法，因为我的目的还是为了排版选项，而不是表格。</p><p>对于图片的排版，label通常情况下更多放置在图片的正上方或正下方。基于上述原因，我就需要开发另一种选项排版的命令<code>\choices*</code>（本质是<code>\coffinchoice</code>）可以方便地切换不同的anchor（借用了TikZ中的术语），满足不同需求。受耿楠教授的<a href="https://gitee.com/nwafu_nan/hanzibox-l3"><code>hanzibox</code>宏包</a>启发，我决定使用LaTeX3的coffin来完成此命令的研发，最后在几天的调试下基本实现了想要的功能。</p><h2 id="宏包代码优化">宏包代码优化</h2><p>李泽平老师当时看了我的代码和我说，一个命令的代码不应该超过一个屏幕，所以我需要对代码进行优化。</p><p>其实我最开始设计的时候就是想有优化的：也就是一些算法可以单独抽离出来成为单独的函数，其实很多成熟的宏包都是这么做的，但是我没这么弄过，没有任何经验，最开始弄的时候直接出bug，然后想着“先实现再完美”（因为我一直以来都有点完美主义，导致了不少的拖延hhh），现在功能基本实现，就尝试优化一下代码。</p><h3 id="键值优化">键值优化</h3><p>键值的有一定规范，比如使用<code>-</code>来分隔使得更容易阅读，比如<code>random-items</code>就是控制<code>items</code>的乱序。</p>]]></content>
    
    
    <summary type="html">主要分析一下编写思路以及思考如何进一步优化</summary>


    <category term="个人作品" scheme="https://xkwxdyy.github.io/categories/%E4%B8%AA%E4%BA%BA%E4%BD%9C%E5%93%81/"/>
    
    <category term="LaTeX3实例分析" scheme="https://xkwxdyy.github.io/categories/LaTeX3%E5%AE%9E%E4%BE%8B%E5%88%86%E6%9E%90/"/>
    
    
    <category term="LaTeX3" scheme="https://xkwxdyy.github.io/tags/LaTeX3/"/>
    
    <category term="实例分析" scheme="https://xkwxdyy.github.io/tags/%E5%AE%9E%E4%BE%8B%E5%88%86%E6%9E%90/"/>
    
    <category term="宏包" scheme="https://xkwxdyy.github.io/tags/%E5%AE%8F%E5%8C%85/"/>
    
  </entry>
  
  <entry>
    <title>我的LaTeX学习历程</title>
    <link href="https://xkwxdyy.github.io/2022/01/08/LaTeX-learning/"/>
    <id>https://xkwxdyy.github.io/2022/01/08/LaTeX-learning/</id>
    <published>2022-01-08T13:22:51.000Z</published>
    <updated>2022-01-21T10:54:00.000Z</updated>
    
    <content type="html"><![CDATA[<h2 id="latex-todo">LaTeX-TODO</h2><p>用于记录我想编写解决的代码问题</p><ul><li>选择题或解答题和图在一起的时候的排版<ul><li>coffin</li></ul></li><li>选择题的末行括号自动出现</li><li>choices命令结合答案</li></ul><h2 id="自己的latex经历杂谈">自己的LaTeX经历杂谈</h2><p>最开始是大二第一次接触，具体怎么知道的LaTeX我已经忘记，但是当时主要是被LaTeX的数学公式排版所吸引，我还记得当时在图书馆看刘海洋的书，一边看一边在TeXShop里看例题的编译效果，这种反馈虽然比word的所见即所得要略慢一丢丢，但也没差到哪里，而且精致的数学排版让我一下就喜欢上了LaTeX。</p><p>应该就是在大二大三那个时候，自己也偶尔瞎研究，当时什么LaTeX工作室，论坛，tex.se都不知道，自己搞beamer、笔记模版啥的，遇到问题直接百度，CSDN，东拼西凑，我还深刻记得当时去弄水印背景，还是查到用box的方式结合<code>fancyhdr</code>宏包来处理（其实就是把图片放在了页眉或者页脚的方式）那个水平垂直距离都是一点点手动去调整尝试，现在想想都有点莫名的辛酸hhh。</p><p>然后就因为平常没什么需求用到，就搁置了LaTeX很久都没动，一直到了大三的那个暑假夏令营要弄简历，我就想着要不用LaTeX弄一个简历出来，然后很自然地就去网上找模版（其实都不太满意，这也是为什么我现在都不太用别人的模版的原因之一），好不容易找到一个整体还算满意的，但是编译起来就是出bug（这是我不用别人模版的原因之二，别人的较为成熟的模版一般都有较强的一致性，比如一些自定义的命令之类的，自己如果功力不够在那瞎改那就很容易报错），时间又很紧，于是去网上找人代排，好像是花了50元改了一小个地方。</p><p>正好那个时候我想到了我本科的毕业论文模版是CTEX套装写的（现在基本已经被淘汰了），就想着要不也让人重写一个，结果我一问价格，800起步，我直接一个震惊给到！</p><p>莫名的我就很气，气我自己的LaTeX怎么这么菜，就是那一次我就下定决心一定要学好LaTeX。</p><p>然后大四搞毕业论文，上课什么的也没搞，就想着毕业的暑假搞。在学校的时候机缘巧合下知道了万述波老师的书，然后买了一本发现还不错，然后在万老师的群里又看到陈晓老师也要出一本书，而且是更多应用之类的，我个人对LaTeX的应用和实现效果是很感兴趣的，所以也在刚发行的时候果断也买了一本。</p><p>在暑假主要的时间就是在跟着陈晓老师的书一点点码，有的时候还出了很多的bug，书上也会有点小错误，就这里问，那里查，不过在群里我也认识了很多LaTeX水平很高的老师，比如耿楠教授、李泽平老师，乙醇哥等等，也有和我一样也是在学习LaTeX的同学，比如郭李军学弟（现在也变得水平很高了），他们在我的LaTeX学习过程中提供了莫大的帮助，在这里要表示衷心的感谢！</p><p>我现在重新看自己的暑假的学习，我印象最深的应该就是三个：<code>tabularray</code>宏包、TikZ和LaTeX3：</p><ul><li><code>tabularray</code>宏包<ul><li>其实我在码书上的表格部分的时候群里的老师就推荐我用这个宏包了，我当时的想法是基础的还是要掌握的，所以一直拖到一本书搞完才接触了这个宏包，然后...真香，这个宏包简直太厉害，对表格的处理非常的人性化，和原来的普通表格处理简直是天差地别</li></ul></li><li>TikZ<ul><li>TikZ的<code>node</code>当时真是让我觉得很震惊，因为我发现我以前辛苦研究的那个水印的问题，用<code>node</code>可以轻松完成，而且相对距离这个是我非常喜欢的，因为在原来的某个参数变了之后，其它的可以“牵一发而动全身”，不需要自己再去手动调整，这才是符合我预期的计算机的功能，</li><li>TikZ学完之后其实很少有绘图的需求，但是偶尔会用来画个小玩意，比如用<code>node</code>搞了个命令实现overlay的效果，主要在逻辑推导过程中，实现箭头（也可以变成其它的）上面可以有问号或是其它任何字符，灵活度更高</li></ul></li><li>LaTeX3<ul><li>这应该是我现阶段用的最多的代码</li><li>我本身是对TeX的底层实现挺感兴趣的，但是一些相关的书却有点让我不太容易读懂，因为我本身没有计算机的基础，读起来有些头疼（orz）。但是刚好那个时候LaTeX工作室发了项子越老师录制的LaTeX3讲解视频，然后一下子打开了新世界</li><li>统一格式、优化宏展开等等有点让我入了LaTeX3的坑，而且用它也某种程度上弥补了我本来想学习TeX的想法（虽然LaTeX3的一些命令没有TeX的基础还是读不了，但是对于大部分的内容是可以且容易理解接受和应用的），因为我最根本还是想能够自己实现一些功能，设计一些小东西。</li><li>但是目前（即使是现在）关于LaTeX3的<strong>教程</strong>其实还是没有很多。为什么我要强调“教程”呢？因为LaTeX3的官方文档<code>interface3.pdf</code>或<code>source3.pdf</code>是API性质的文档，个人理解是可以看作是一本字典，它会把变量函数的功能很客观地告诉你，虽然对于大部分来说，看了之后基本是知道怎么用的，但是也有相当一部分读完后还是一脸懵逼，如果类比一下高中学习的话，就会感觉例题太少了，如果学生的能力还不到位的话，只讲概念定理，学生对于其的把握还不到位，遇到问题也不知道如何去解决。而从我个人的LaTeX3学习经验来看，我觉得读别人写好的作品是一个很好的学习方式，其实这些就相当于是一个个例题，如果能够读懂，并明白其中的使用方式的话对于学好LaTeX3也是有非常大的帮助的。所以我的博客的有一个模块就是LaTeX3实例分析，只能以我浅薄的知识尝试去理解去读懂这些代码的逻辑等等，希望能够帮到有需要的人。</li></ul></li></ul><p>目前基本是主要用LaTeX3写一些小玩意，LaTeX3甚至超过了TikZ对我的吸引力hhh，但是TikZ用好也很厉害，还是都要好好学一下。</p>]]></content>
    
    
    <summary type="html">主要介绍个人的LaTeX学习的几个阶段。</summary>


    <category term="LaTeX杂谈" scheme="https://xkwxdyy.github.io/categories/LaTeX%E6%9D%82%E8%B0%88/"/>
    
    
    <category term="LaTeX杂谈" scheme="https://xkwxdyy.github.io/tags/LaTeX%E6%9D%82%E8%B0%88/"/>
    
  </entry>
  
  <entry>
    <title>LaTeX3个人学习经验</title>
    <link href="https://xkwxdyy.github.io/2022/01/08/LaTeX3-learning/"/>
    <id>https://xkwxdyy.github.io/2022/01/08/LaTeX3-learning/</id>
    <published>2022-01-08T13:22:38.000Z</published>
    <updated>2022-01-20T05:40:00.000Z</updated>
    
    <content type="html"><![CDATA[<h2 id="前言">前言</h2><p>我在很久之前自己写过一个LaTeX3学习个人经验，整理了自己学习过程中的学习资料，并写了一些学习心得，只分享给了两位老师，一个原因是这两个老师当时就想学习LaTeX3，第二个原因是时间有点匆忙，我的文字叙述并不流畅和简洁（虽然口语化容易读懂，但是感觉写成书面文章还是需要适当的言简意赅）</p><p>后来郭李军学弟在LaTeX工作室发了一个<a href="https://www.latexstudio.net/index/details/index/mid/2280">LaTeX3学习资料</a> ，我发现整理的和我差不多，但是多了两三个（然后我马上就码住了hhh）。其实现在市面上能找到的LaTeX3资料其实还是有不少的，对于LaTeX3入门应该是足够的，但是如果想要LaTeX3能更深入地学习下去（比如学习<code>interface3.pdf</code>介绍的一些LaTeX2e中不常见（对于一般用户来说比较少用）的模块，如regex、prg、msg、file等等）现在已有的资料某种意义上是不够的。</p><p>但是其实已经有很多优秀的宏包文类是用LaTeX3编写的，比如<code>ctex</code>宏集,<code>tabularray.sty</code>,<code>fduthesis.cls</code>等，但是这些都是一些大佬编写，本身并不是为了告诉你怎么使用LaTeX3而编写的，所以读起来会有一定难度，但是如果细品的话能够发现里面有很多细节和变量函数的使用是值得我们学习的，所以需要一个“引路人”能够带我们读懂这些代码，或是分析一些其中的细节。</p><p>而我的博客想做的主要就是这个事，我的代码水平其实非常的一般，但是我想把我能读懂的，我的一些体会分享出来，大家一起讨论学习，这样对我来说也是有很大的提高。</p><p>目前关于LaTeX3想做的主要但不限于下面几个：</p><ul><li>分析一些LaTeX3实例，LaTeX3应用的代码</li><li>讲述、记录或分析我自己用LaTeX3写命令的想法和思路（也能够帮助我进一步优化）</li><li>一些LaTeX3的常用方法和技巧</li></ul><h2 id="个人推荐的latex3学习顺序">个人推荐的LaTeX3学习顺序</h2><h3 id="了解背景和latex3基础">了解背景和LaTeX3基础</h3><h4 id="背景">背景</h4><ul><li>曾祥东老师的知乎文章：<a href="https://zhuanlan.zhihu.com/p/92851140">LaTeX3 教程（一）——背景知识</a></li><li>LaTeX工作室发布，项子越老师录制的b站视频：<a href="https://www.bilibili.com/video/BV1L44y1676h?from=search&amp;seid=14283996233698968390&amp;spm_id_from=333.337.0.0">LaTeX3 教程一：简介</a></li></ul><h4 id="基本语法和知识">基本语法和知识</h4><ul><li>曾祥东老师的知乎文章：<a href="https://zhuanlan.zhihu.com/p/92853481">LaTeX3 教程（二）——语法概要</a></li><li>LaTeX工作室发布，项子越老师录制的b站视频：<a href="https://www.bilibili.com/video/BV1g5411u7wg?spm_id_from=333.999.0.0">LaTeX3 教程二：变量，函数及基本程序结构</a></li></ul><h4 id="宏展开">宏展开</h4><ul><li>LaTeX工作室发布，项子越老师录制的b站视频：<a href="https://www.bilibili.com/video/BV1HP4y1s7CR?spm_id_from=333.999.0.0">LaTeX3 教程三：宏展开</a></li></ul><h4 id="一些示例的应用">一些示例的应用</h4><ul><li><p>曾祥东老师的知乎文章：<a href="https://zhuanlan.zhihu.com/p/92854940">LaTeX3 教程（三）——从一个例子说起</a></p></li><li><p>LaTeX工作室发布，项子越老师录制的b站视频：<a href="https://www.bilibili.com/video/BV18Z4y1X7vK?spm_id_from=333.999.0.0">LaTeX3 编程 终章 - 教程四：常用库</a></p></li><li><p>项子越老师的个人博客中有一个<a href="https://www.alanshawn.com/latex3-tutorial/"><code>latex3-tutorial</code></a>中有视频中没提到的一些内容，绝大部分函数模块都给了个例子，大致告诉你LaTeX3能够实现一些什么样的效果</p></li></ul><h4 id="细节补充">细节补充</h4><ul><li>知乎一位大佬写了一篇文章：<a href="https://zhuanlan.zhihu.com/p/408331900">一份勉强简短的LaTeX3编程介绍</a>，如果完成上面部分学习的读者阅读这篇文章，就会发现这篇文章是对上面内容的一个“总结体”，并且补充了一些小细节，即使学完了上面的内容也推荐学习一下</li><li>LaTeX3团队成员Joseph Wright写的<a href="https://www.texdev.net/tags/#programming-latex3">一些文章</a>（不止LaTeX3），很多内容比如<code>xparse</code>宏包的声明命令和其它宏包的区别，<a href="https://www.texdev.net/2012/04/29/programming-latex3-more-on-expansion/">关于LaTeX3的宏展开的<code>f</code>,<code>o</code>,<code>x</code> 有什么区别</a>等文章都非常值得一看</li></ul><h3 id="自己动手写小玩意">自己动手写小玩意</h3><ul><li>在学习了上面的内容后，读者已经完全能够自己动手写一点小玩意了</li></ul><h3 id="分析他人的作品应用">分析他人的作品、应用</h3><ul><li>LaTeX工作室里也有一些用户上传的<a href="https://www.latexstudio.net/index/lists/barSearch/text/LaTeX3">作品</a> ，可以自己尝试阅读一下代码看看</li><li>慢慢地可以开始读一些LaTeX3编写的宏包或文类了，看看大佬们是怎么用这些变量函数的，比如用<code>clist</code> 模块的函数来批量处理（比如批量声明新变量）等等</li></ul><h2 id="希望掌握的技能">希望掌握的“技能”</h2><h3 id="养成良好的代码规范">养成良好的代码规范</h3><ul><li>LaTeX3有自己的一套<a href="https://ctan.math.illinois.edu/macros/latex/contrib/l3kernel/l3styleguide.pdf">代码规范</a> ，和<a href="https://gitee.com/zepinglee/latex2e-style-guide">LaTeX2e的代码规范</a>有一定的区别，不管是为了自己写、修改方便还是为了代码分享的时候他人阅读方便，都希望读者养成良好的代码规范习惯</li></ul><h3 id="学习xparse宏包">学习<code>xparse</code>宏包</h3><ul><li><code>xparse</code>宏包提供的命令不仅能够封装LaTeX3的代码，在LaTeX2e的使用过程中体验会更好</li><li><code>lshort-zh-cn.pdf</code>中有部分介绍，但是还是希望直接读<code>xparse</code>的官方文档</li></ul><h3 id="学会到论坛提问">学会到论坛提问</h3><ul><li><a href="https://tex.stackexchange.com/">tex.se</a> 国外的网站，大佬很多，只要你的问题描述清楚，基本都会有大佬反馈</li><li><a href="https://ask.latexstudio.net/">LaTeX工作室提问</a> 国内的网站，也有很多大佬，听说雾月大佬回答非常详细，而且LaTeX3功力也极强</li></ul>]]></content>
    
    
    <summary type="html">本文主要介绍个人学习LaTeX3过程中的一些心得体会。</summary>


    <category term="LaTeX3杂谈" scheme="https://xkwxdyy.github.io/categories/LaTeX3%E6%9D%82%E8%B0%88/"/>
    
    
    <category term="LaTeX3杂谈" scheme="https://xkwxdyy.github.io/tags/LaTeX3%E6%9D%82%E8%B0%88/"/>
    
  </entry>
  
  <entry>
    <title>个人博客搭建规划</title>
    <link href="https://xkwxdyy.github.io/2022/01/08/blog-outline/"/>
    <id>https://xkwxdyy.github.io/2022/01/08/blog-outline/</id>
    <published>2022-01-08T10:40:17.000Z</published>
    <updated>2022-01-08T10:40:17.000Z</updated>
    
    <content type="html"><![CDATA[<p>这个博客主要用于输出与记录，特别是关于LaTeX的部分希望可以对于其他学习者有所帮助与启发。</p><p>目前想到的分类和标签有以下这几个，会不断补充与完善：</p><h2 id="分类">分类</h2><ul><li>杂谈</li><li>LaTeX杂谈</li><li>数学杂谈</li><li>LaTeX3实例分析</li><li>LaTeX问题解决</li><li>LaTeX3应用</li><li>个人作品</li></ul><h2 id="标签">标签</h2><ul><li>LaTeX</li><li>LaTeX3</li><li>问题解决</li><li>实例分析</li><li>杂谈</li><li>应用</li><li>宏包</li></ul>]]></content>
    
    
    <summary type="html">主要介绍一下这个博客的整体方向以及分类和标签的大概内容</summary>


    <category term="杂谈" scheme="https://xkwxdyy.github.io/categories/%E6%9D%82%E8%B0%88/"/>
    
    
    <category term="杂谈" scheme="https://xkwxdyy.github.io/tags/%E6%9D%82%E8%B0%88/"/>
    
  </entry>
  
  <entry>
    <title>Hexo与Fluid常用设置汇总</title>
    <link href="https://xkwxdyy.github.io/2022/01/08/hexo-learning/"/>
    <id>https://xkwxdyy.github.io/2022/01/08/hexo-learning/</id>
    <published>2022-01-08T02:39:58.000Z</published>
    <updated>2022-01-09T05:50:00.000Z</updated>
    
    <content type="html"><![CDATA[<h3 id="使用数学公式">使用数学公式</h3><p><a href="http://dongjiyinhe.com/posts/21980/">在 Hexo 的 Fluid 主题中使用 LaTeX 公式</a></p><p><span class="math inline">\(x^2\)</span></p><p><span class="math display">\[\lim_{n \to \infty} x^n = 0\]</span></p><h3 id="图床">图床</h3><p><a href="https://picgo.github.io/PicGo-Doc/zh/guide/">PicGo</a></p><h3 id="组图">组图</h3><p>如果想把多张图片按一定布局组合显示，你可以在 markdown 中按如下格式：</p><figure class="highlight markdown"><table><tr><td class="gutter"><div class="code-wrapper"><pre><span class="line">1</span><br><span class="line">2</span><br><span class="line">3</span><br><span class="line">4</span><br><span class="line">5</span><br><span class="line">6</span><br><span class="line">7</span><br></pre></div></td><td class="code"><pre><code class="hljs markdown">&#123;% gi total n1-n2-... %&#125;<br>  ![](url)<br>  ![](url)<br>  ![](url)<br>  ![](url)<br>  ![](url)<br>&#123;% endgi %&#125;<br></code></pre></td></tr></table></figure><p>total：图片总数量，对应中间包含的图片 url 数量 n1-n2-...：每行的图片数量，可以省略，默认单行最多 3 张图，求和必须相等于 total，否则按默认样式</p><h3 id="tag-插件">Tag 插件</h3><h4 id="便签"><a href="https://hexo.fluid-dev.com/docs/guide/#便签">#</a>便签</h4><p>在 markdown 中加入如下的代码来使用便签：</p><figure class="highlight markdown"><table><tr><td class="gutter"><pre><span class="line">1</span><br><span class="line">2</span><br><span class="line">3</span><br><span class="line">4</span><br><span class="line">5</span><br></pre></td><td class="code"><pre><code class="hljs markdown">&#123;% note success %&#125;<br>文字 或者 <span class="hljs-code">`markdown`</span> 均可<br>&#123;% endnote %&#125;<br><br><span class="hljs-section"># 注意：上面第一行和第三行要单独成行</span><br></code></pre></td></tr></table></figure><p>或者使用 HTML 形式：</p><figure class="highlight html"><table><tr><td class="gutter"><pre><span class="line">1</span><br></pre></td><td class="code"><pre><code class="hljs html"><span class="hljs-tag">&lt;<span class="hljs-name">p</span> <span class="hljs-attr">class</span>=<span class="hljs-string">&quot;note note-primary&quot;</span>&gt;</span>标签<span class="hljs-tag">&lt;/<span class="hljs-name">p</span>&gt;</span><br></code></pre></td></tr></table></figure><p>可选便签：</p><div class="note note-primary">            <p>primary</p>          </div><div class="note note-secondary">            <p>secondary</p>          </div><div class="note note-success">            <p>success</p>          </div><div class="note note-danger">            <p>danger</p>          </div><div class="note note-warning">            <p>warning</p>          </div><div class="note note-info">            <p>info</p>          </div><div class="note note-light">            <p>light</p>          </div><h4 id="行内标签"><a href="https://hexo.fluid-dev.com/docs/guide/#行内标签">#</a>行内标签</h4><p>在 markdown 中加入如下的代码来使用 Label：</p><figure class="highlight markdown"><table><tr><td class="gutter"><pre><span class="line">1</span><br></pre></td><td class="code"><pre><code class="hljs markdown">&#123;% label primary @text %&#125;<br></code></pre></td></tr></table></figure><p>或者使用 HTML 形式：</p><figure class="highlight html"><table><tr><td class="gutter"><pre><span class="line">1</span><br></pre></td><td class="code"><pre><code class="hljs html"><span class="hljs-tag">&lt;<span class="hljs-name">span</span> <span class="hljs-attr">class</span>=<span class="hljs-string">&quot;label label-primary&quot;</span>&gt;</span>Label<span class="hljs-tag">&lt;/<span class="hljs-name">span</span>&gt;</span><br></code></pre></td></tr></table></figure><p>可选 Label：</p><span class="label label-primary">primary</span><span class="label label-default">default</span><span class="label label-info">info</span><span class="label label-success">success</span><span class="label label-warning">warning</span><span class="label label-danger">danger</span><div class="note note-warning">            <p>若使用</p><figure class="highlight markdown"><table><tr><td class="gutter"><pre><span class="line">1</span><br></pre></td><td class="code"><pre><code class="hljs markdown">&#123;% label primary @text %&#125;<br></code></pre></td></tr></table></figure><p>那么其中的text 不能以 @ 开头</p>          </div><h4 id="勾选框"><a href="https://hexo.fluid-dev.com/docs/guide/#勾选框">#</a>勾选框</h4><p>在 markdown 中加入如下的代码来使用 Checkbox：</p><figure class="highlight markdown"><table><tr><td class="gutter"><pre><span class="line">1</span><br></pre></td><td class="code"><pre><code class="hljs markdown">&#123;% cb text, checked?, incline? %&#125;<br></code></pre></td></tr></table></figure><p>text：显示的文字 checked：默认是否已勾选，默认 false incline: 是否内联（可以理解为后面的文字是否换行），默认 false</p><p>示例：</p><div>            <input type="checkbox" disabled >普通示例          </div><div>            <input type="checkbox" disabled checked="checked">默认选中          </div>            <input type="checkbox" disabled >内联示例          <p>后面文字不换行</p><input type="checkbox" disabled ><p>也可以只传入一个参数，文字写在后边（这样不支持外联）</p><h4 id="按钮"><a href="https://hexo.fluid-dev.com/docs/guide/#按钮">#</a>按钮</h4><p>你可以在 markdown 中加入如下的代码来使用 Button：</p><figure class="highlight markdown"><table><tr><td class="gutter"><pre><span class="line">1</span><br></pre></td><td class="code"><pre><code class="hljs markdown">&#123;% btn url, text, title %&#125;<br></code></pre></td></tr></table></figure><p>或者使用 HTML 形式：</p><figure class="highlight html"><table><tr><td class="gutter"><pre><span class="line">1</span><br></pre></td><td class="code"><pre><code class="hljs html"><span class="hljs-tag">&lt;<span class="hljs-name">a</span> <span class="hljs-attr">class</span>=<span class="hljs-string">&quot;btn&quot;</span> <span class="hljs-attr">href</span>=<span class="hljs-string">&quot;url&quot;</span> <span class="hljs-attr">title</span>=<span class="hljs-string">&quot;title&quot;</span>&gt;</span>text<span class="hljs-tag">&lt;/<span class="hljs-name">a</span>&gt;</span><br></code></pre></td></tr></table></figure><p>url：跳转链接 text：显示的文字 title：鼠标悬停时显示的文字（可选）</p><p><a href="javascript:;">text</a></p><h3 id="社交页图标">社交页图标</h3><p>在<strong>主题配置</strong>中设置：</p><figure class="highlight yaml"><table><tr><td class="gutter"><pre><span class="line">1</span><br><span class="line">2</span><br><span class="line">3</span><br><span class="line">4</span><br><span class="line">5</span><br></pre></td><td class="code"><pre><code class="hljs yaml"><span class="hljs-attr">about:</span><br>  <span class="hljs-attr">icons:</span><br>    <span class="hljs-bullet">-</span> &#123; <span class="hljs-attr">class:</span> <span class="hljs-string">&#x27;iconfont icon-github-fill&#x27;</span>, <span class="hljs-attr">link:</span> <span class="hljs-string">&#x27;https://github.com&#x27;</span>, <span class="hljs-attr">tip:</span> <span class="hljs-string">&#x27;GitHub&#x27;</span> &#125;<br>    <span class="hljs-bullet">-</span> &#123; <span class="hljs-attr">class:</span> <span class="hljs-string">&#x27;iconfont icon-douban-fill&#x27;</span>, <span class="hljs-attr">link:</span> <span class="hljs-string">&#x27;https://douban.com&#x27;</span>, <span class="hljs-attr">tip:</span> <span class="hljs-string">&#x27;豆瓣&#x27;</span> &#125;<br>    <span class="hljs-bullet">-</span> &#123; <span class="hljs-attr">class:</span> <span class="hljs-string">&#x27;iconfont icon-wechat-fill&#x27;</span>, <span class="hljs-attr">qrcode:</span> <span class="hljs-string">&#x27;/img/favicon.png&#x27;</span> &#125;<br></code></pre></td></tr></table></figure><ul><li><code>class</code>: 图标的 css class，主题内置图标详见<a href="https://hexo.fluid-dev.com/docs/icon/">这里</a></li><li><code>link</code>: 跳转链接</li><li><code>tip</code>: 鼠标悬浮在图标上显示的提示文字</li><li><code>qrcode</code>: 二维码图片，当使用此字段后，点击不再跳转，而是悬浮二维码</li></ul><h3 id="其它一些小细节">其它一些小细节</h3><h4 id="关于苹果的mac搭建博客中需要注意的">关于苹果的Mac搭建博客中需要注意的</h4><ul><li><code>npm install -g hexo-cli</code>安装如果不成功，要使用管理员权限，输入<code>sudo -s</code>回车输密码，然后再安装</li></ul><h4 id="如何链接邮箱">如何链接邮箱</h4><figure class="highlight markdown"><table><tr><td class="gutter"><pre><span class="line">1</span><br><span class="line">2</span><br></pre></td><td class="code"><pre><code class="hljs markdown"><span class="hljs-section"># 注意要加一个mailto:</span><br>[<span class="hljs-string">E-mail</span>](<span class="hljs-link">mailto: kangweixia_xdyy@163.com</span>)<br></code></pre></td></tr></table></figure><h2 id="参考">参考</h2><ul><li><p><a href="https://hexo.fluid-dev.com/docs/guide/">Fluid配置指南</a></p></li><li><p><a href="https://hexo.io/zh-cn/docs/front-matter">Front-matter</a></p></li><li><p>博客的搭建步骤主要参考<a href="https://syvshc.github.io/2021-03-03-build-github-io/">乙醇写的文章</a></p></li></ul>]]></content>
    
    
    <summary type="html">从官网指南上选取的部分设置，方便个人需要的时候查找</summary>


    <category term="Hexo" scheme="https://xkwxdyy.github.io/tags/Hexo/"/>
    
    <category term="Fluid" scheme="https://xkwxdyy.github.io/tags/Fluid/"/>
    
  </entry>
  
  <entry>
    <title>Markdown 语法学习</title>
    <link href="https://xkwxdyy.github.io/2022/01/08/markdown-learning/"/>
    <id>https://xkwxdyy.github.io/2022/01/08/markdown-learning/</id>
    <published>2022-01-07T16:00:00.000Z</published>
    <updated>2022-01-07T16:00:00.000Z</updated>
    
    <content type="html"><![CDATA[<h2 id="参考">参考</h2><ul><li>语法基础篇：<a href="https://kiyanyang.github.io/posts/78e09c9c/" class="uri">https://kiyanyang.github.io/posts/78e09c9c/</a></li></ul>]]></content>
    
    
    <summary type="html">记录Markdown的常见语法</summary>


    <category term="markdown" scheme="https://xkwxdyy.github.io/tags/markdown/"/>
    
  </entry>
  
  <entry>
    <title>Hello World</title>
    <link href="https://xkwxdyy.github.io/2022/01/06/hello-world/"/>
    <id>https://xkwxdyy.github.io/2022/01/06/hello-world/</id>
    <published>2022-01-06T02:53:14.346Z</published>
    <updated>2022-01-06T02:53:14.346Z</updated>
    
    <content type="html"><![CDATA[<p>Welcome to <a href="https://hexo.io/">Hexo</a>! This is your very first post. Check <a href="https://hexo.io/docs/">documentation</a> for more info. If you get any problems when using Hexo, you can find the answer in <a href="https://hexo.io/docs/troubleshooting.html">troubleshooting</a> or you can ask me on <a href="https://github.com/hexojs/hexo/issues">GitHub</a>.</p><h2 id="quick-start">Quick Start</h2><h3 id="create-a-new-post">Create a new post</h3><figure class="highlight bash"><table><tr><td class="gutter"><div class="code-wrapper"><pre><span class="line">1</span><br></pre></div></td><td class="code"><pre><code class="hljs bash">$ hexo new <span class="hljs-string">&quot;My New Post&quot;</span><br></code></pre></td></tr></table></figure><p>More info: <a href="https://hexo.io/docs/writing.html">Writing</a></p><h3 id="run-server">Run server</h3><figure class="highlight bash"><table><tr><td class="gutter"><pre><span class="line">1</span><br></pre></td><td class="code"><pre><code class="hljs bash">$ hexo server<br></code></pre></td></tr></table></figure><p>More info: <a href="https://hexo.io/docs/server.html">Server</a></p><h3 id="generate-static-files">Generate static files</h3><figure class="highlight bash"><table><tr><td class="gutter"><pre><span class="line">1</span><br></pre></td><td class="code"><pre><code class="hljs bash">$ hexo generate<br></code></pre></td></tr></table></figure><p>More info: <a href="https://hexo.io/docs/generating.html">Generating</a></p><h3 id="deploy-to-remote-sites">Deploy to remote sites</h3><figure class="highlight bash"><table><tr><td class="gutter"><pre><span class="line">1</span><br></pre></td><td class="code"><pre><code class="hljs bash">$ hexo deploy<br></code></pre></td></tr></table></figure><p>More info: <a href="https://hexo.io/docs/one-command-deployment.html">Deployment</a></p>]]></content>


    <summary type="html">&lt;p&gt;Welcome to &lt;a href=&quot;https://hexo.io/&quot;&gt;Hexo&lt;/a&gt;! This is your very first post. Check &lt;a href=&quot;https://hexo.io/docs/&quot;&gt;documentation&lt;/a&gt; for</summary>


  </entry>
  
</feed>