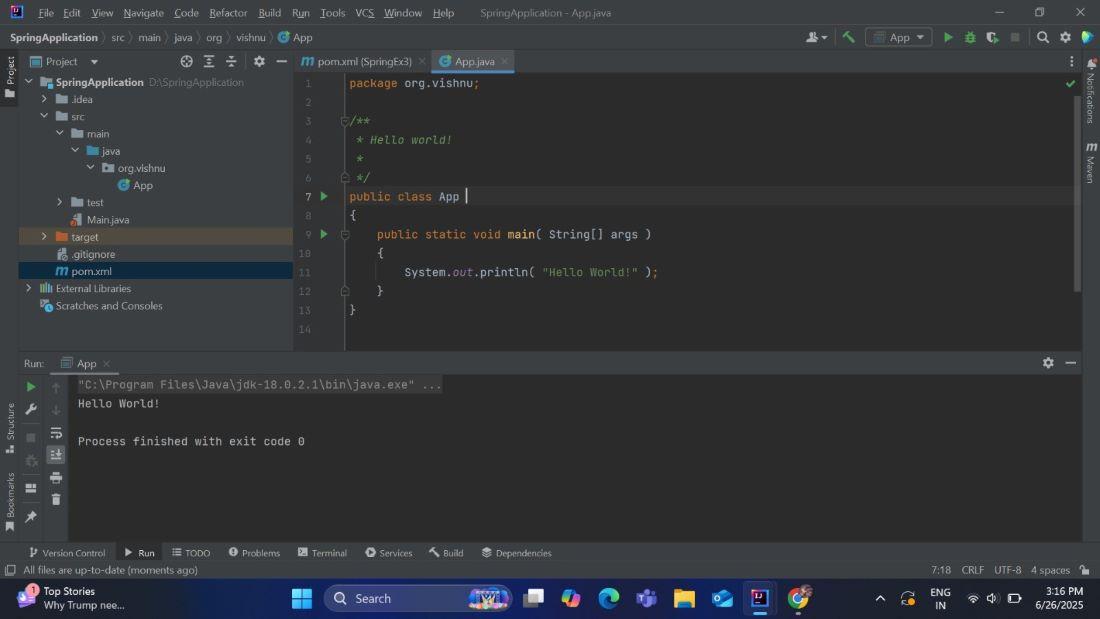
Creating a simple Spring application helps developers understand how the Spring Framework simplifies Java development by managing dependencies and application flow. It provides a lightweight and flexible way to build scalable, maintainable applications.
- Uses Dependency Injection (DI) to reduce tight coupling between components
- Supports easy configuration through annotations or XML
- Simplifies development of enterprise-level Java applications
Prerequisites
Step-by-Step Implementation
Follow these steps to build and run a simple application using the Spring Framework efficiently.
Step 1: Create a Maven project
Let’s start by creating a simple Maven-based Spring project following step by step.
- Open IntelliJ IDEA.
- Navigate to the File tab-> Click new-> Project.
- Choose Maven as a project type.
- Click Next and select Quick Start Archetype.
- Fill in the details like-> GroupId: com.Vishnu, ArtifactId: SpringApplication.
- Choose a location for the project and click Finish.

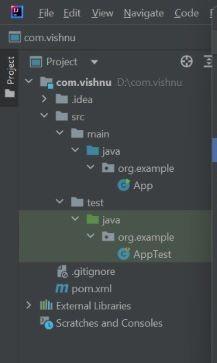
Step 2: Project Structure
After creating the project successfully and adding the necessary dependencies to your Spring application. The project structure will looks something like this.
Step 3: Add the Dependency to pom.xml File
Follow these steps below to add dependencies to pom.xml:
- Open the pom.xml file.
- Visit the Maven repository site to add necessary dependencies.
- Add dependencies inside pom.xml.
- And right click reload maven dependencies.
pom.xml:
<project xmlns="https://maven.apache.org/POM/4.0.0"
         xmlns:xsi="https://www.w3.org/2001/XMLSchema-instance"
         xsi:schemaLocation="https://maven.apache.org/POM/4.0.0
         https://maven.apache.org/xsd/maven-4.0.0.xsd">
    <modelVersion>4.0.0</modelVersion>
    <groupId>com.example</groupId>
    <artifactId>spring-demo</artifactId>
    <version>1.0-SNAPSHOT</version>
    <dependencies>
    <!-- Spring Core -->
    <dependency>
        <groupId>org.springframework</groupId>
        <artifactId>spring-core</artifactId>
        <version>5.3.29</version>
    </dependency>

    <!-- Spring Context -->
    <dependency>
        <groupId>org.springframework</groupId>
        <artifactId>spring-context</artifactId>
        <version>5.3.29</version>
    </dependency>
</dependencies>

    <build>
        <plugins>
            <plugin>
                <groupId>org.apache.maven.plugins</groupId>
                <artifactId>maven-compiler-plugin</artifactId>
                <version>3.11.0</version>
                <configuration>
                    <source>1.8</source>
                    <target>1.8</target>
                </configuration>
            </plugin>
        </plugins>
    </build>
</project>
Step 4: Open the Main class and Run
Open the main class that contains the main method and run your Spring application. If everything is set up correctly, then your spring application will run successfully, and you will see the desired output on the console.
App.java:
package org.vishnu;

import org.springframework.context.ApplicationContext;
import org.springframework.context.annotation.AnnotationConfigApplicationContext;

public class App {

    public static void main(String[] args) {

        // Initialize Spring IoC Container
        ApplicationContext context =
                new AnnotationConfigApplicationContext(AppConfig.class);

        // Retrieve bean from the container
        MessageService messageService =
                context.getBean(MessageService.class);

        // Use the bean
        messageService.displayMessage();

        // Close the container
        ((AnnotationConfigApplicationContext) context).close();
    }
}
Step 5: Create MessageService Class
Create a simple Java class that contains the business logic. This class will be managed as a Spring bean by the IoC container through the configuration defined in AppConfig.
package org.vishnu;

import org.springframework.context.annotation.Bean;
import org.springframework.context.annotation.Configuration;

@Configuration
public class AppConfig {

    @Bean
    public MessageService messageService() {
        return new MessageService();
    }
}
MessageService.java
package org.vishnu;

public class MessageService {

    public void displayMessage() {
        System.out.println("Hello Spring!");
    }
}
Output: