

Your Complete Guide to GPIO Zero on Raspberry Pi
Working with GPIO pins on the Raspberry Pi can be intimidating for beginners. With so many options and endless components, knowing where to start is hard. That’s where GPIO Zero comes in—a simple Python library that makes controlling your hardware straightforward and accessible.
GPIO Zero is a replacement for the now deprecated RPI.GPIO library. It comes pre-installed with the new Raspberry Pi OS and supports a variety of components like LEDs, buttons, and sensors.
In this guide, I’ll explain how to set up GPIO Zero, work with common components, and unlock the full potential of your Raspberry Pi. I will also show you how to migrate your old RPI.GPIO code to GPIO Zero as well. Let’s get started!
If you’re like me and sometimes mix up syntax between programming languages, I’ve got just the thing for you. I’ve put together a Python cheat sheet with all the essential syntax in one place, so you can keep it handy and avoid any confusion. Download it here for free!
Getting Started with GPIO Zero
GPIO Zero is a Python library that supports the new Raspberry Pi 5 and the latest Raspberry Pi OS. It lets you control the GPIOs (General Purpose Input Output) pins on your Raspberry Pi. It is a great alternative to the depreciated RPI.GPIO library.
Let’s start with a few prerequisites, both in terms of hardware and theoretical concepts you need to know before typing any line of code.
Prerequisites
Before starting with GPIO Zero, ensure you have a Raspberry Pi with all the required accessories. You can look here for an assortment of all recommended Raspberry Pi accessories.
In addition to these, I would recommend you get a sensor kit to experiment with the GPIOs. This kit from SunFounder is highly recommended. We will be using components from this kit for this guide.
Besides having all the necessary hardware, ensure your Raspberry Pi is installed with the latest version of Raspberry Pi OS. Follow this guide to install the newest version of Raspberry Pi OS on your Raspberry Pi.
Recommended Guides:
Members get an ad-free version of every guide, plus exclusive project support.
Join the Community | Sign In
- The Best Raspberry Pi Gear Chosen For You
- Install Raspberry Pi OS Bookworm on Raspberry Pi (Illustrated Guide)
- 27 Essential Raspberry Pi Tips Every Beginner Should Know
Pin Numbering
Another key thing to understand before getting started with GPIOs is to know how the pins are numbered. Two different numbering schemes are used, i.e., Broadcom (BCM) and physical (BOARD) numbering.

If like me, you always mix the languages syntax, download my cheat sheet for Python here!
Download now
In the Broadcom (BCM) scheme, the number following the “GPIO” is referenced as the pin number. For example, for GPIO 16, you would consider the pin number 16.
However, in the physical (BOARD) scheme, the exact number of the pin on the board is referenced as the pin number. For example, for GPIO 16, the pin number in a physical (BOARD) scheme would be 36.
You might also like: Tired of Raspberry Pi OS? Level up with these top-rated systems.
GPIO Zero follows the Broadcom (BCM) numbering scheme by default.
If you want to learn more about the GPIOs of Raspberry Pi, several good tutorials are available.
Recommended Guides:
- Getting Started With GPIO Pins on Raspberry Pi (Beginner’s Guide)
- The Raspberry Pi GPIO Pinout: Diagram & Explanation
Installing GPIO Zero
GPIO Zero comes preinstalled with the latest version of Raspberry Pi OS, and you don’t need to install anything.
However, if you are working with Raspberry Pi OS Lite or don’t have GPIO Zero pre-installed, follow these steps to install it using the official repositories:
- Make sure your system is up-to-date using the command:
sudo apt update && sudo apt upgrade
- Ensure your Python and pip are installed and updated using the command:
sudo apt install python3 pip
- Now install GPIO Zero using the command:
sudo apt install python3-gpiozero
That’s it! GPIO Zero is all set up and ready for you to use. Keep reading as we dive into creating our first program with GPIO Zero.
Tip: Command lines can be a pain to memorize. I put the essential Linux commands on a printable cheat sheet so you don't have to keep googling them. You can grab the PDF here if you want to save some time.
Also: I tried to replace my main PC with a Pi 5, here's what happened.
If like me, you always mix the languages syntax, download my cheat sheet for Python here!
Download now
Want to connect with other Raspberry Pi fans? Join the RaspberryTips Community. Ask questions, share your projects, and learn from each other. Join now.
Using GPIO Zero
With our setup complete, let us dive into using GPIO Zero. GPIO Zero is a Python library that can be used in any Python program.
If you are new to Python, I highly recommend reading my book Master Python on Raspberry Pi, which will get you up to speed quickly and focus only on the concepts useful for Raspberry Pi users.
Your First Program with GPIO Zero
For our first program, we will start simple and program our Raspberry Pi to control an LED and make it blink at a fixed frequency.
Circuit Wiring
Before writing the code, we need to figure out how to connect our components. For this example, you will need a Raspberry Pi, a breadboard, an LED, and jumper cables.
Wire your circuit as shown below:
The connections are straightforward. Connect an LED to the GPIO 16 through a resistor.
Once the wiring is completed, you can write your first code using GPIO Zero.
Check this: 15 Easy Projects for Raspberry Pi Beginners
Code
Now, we can get started with writing our code using GPIO Zero. To do so, create a new Python file using any suitable text editor. To do so using nano, you can enter the following command in your terminal:nano blinkingled.py
Now copy and paste this code into the text editor:
from gpiozero import LED
from signal import pause

myLED = LED(16)

myLED.blink(1)

pause()
Save and close this Python file.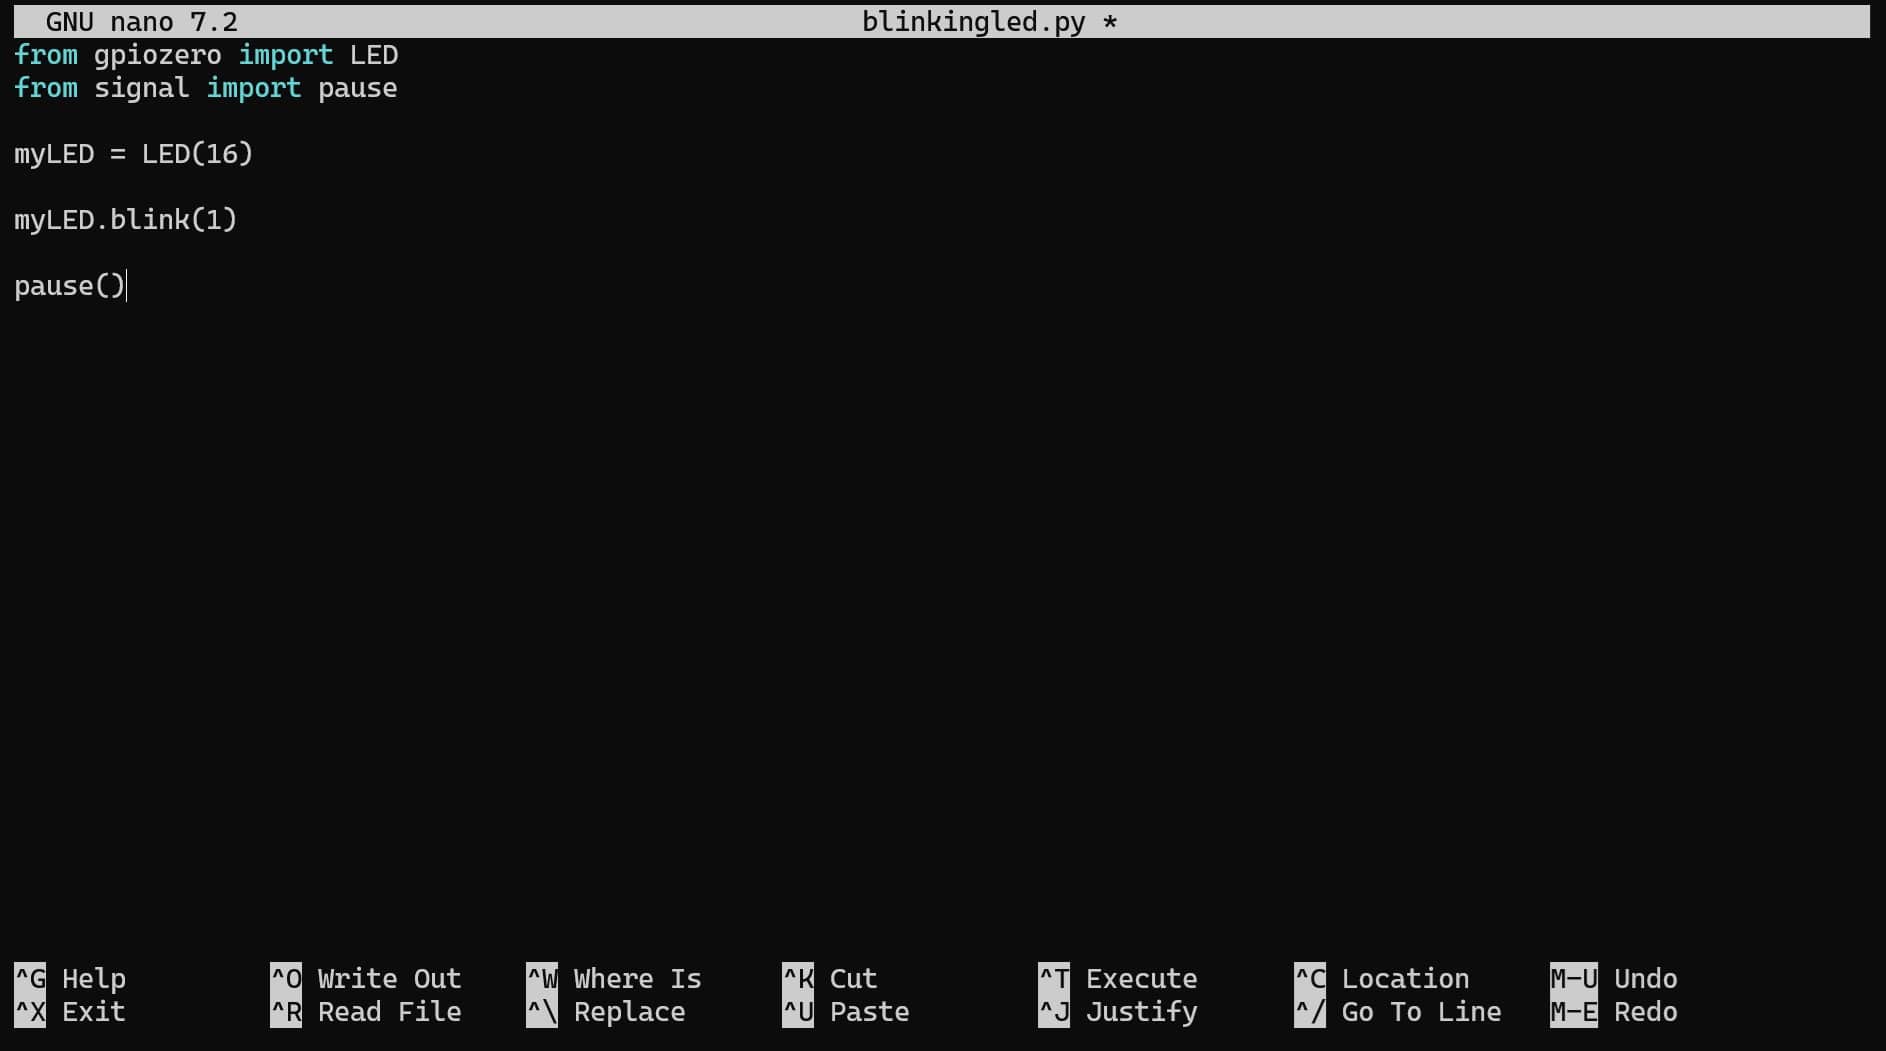
Download the free PDF, keep it open, and stop wasting time on Google.
Download now
The code is simple and self-explanatory:
- We initially import the necessary functions from the libraries using the import command:
from gpiozero import LED
from signal import pause - Next, we initialize the LED object and associate GPIO 16 with this LED using the function:
myLED = LED(16) - Finally, we can use the built-in function of led.blink() to make the LED blink at 1-second intervals:
myLED.blink(1) - Additionally, we need to use the signal.pause() function to hold the program. Otherwise, the program will terminate upon completing the last command, and GPIOs may be reset:
pause()
Results
You can run this program from the terminal using the command:python3 blinkingled.py
Once you run this program, you will be able to see that the LED connected to your Raspberry Pi will start blinking at a 1-second interval.
Going Further with GPIO Zero
We have created our very first program using the GPIO Zero library. We can take it one step further, tho. We can add a button to this project so that the LED lights up whenever that button is pressed and vice versa.
To achieve this, wire your circuit as shown below:
Here, we have added a pushbutton between the ground pin and the GPIO 21 of the Raspberry Pi.
Now, you can change the program to this program:
from gpiozero import LED, Button
from signal import pause

led = LED(16)
button = Button(21)

button.when_pressed = led.on
button.when_released = led.off

pause()
Alternatively, you can take advantage of the object-oriented approach of the GPIO Zero library to simplify your code, as shown below:
from gpiozero import LED, Button
from signal import pause

led = LED(16)
button = Button(21)

led.source = button

pause()
And that’s it! When you execute this program, the LED will light up whenever you press the push button, and when released, the light will turn off.
If you are looking for more advanced recipes using other sensors or devices, the official documentation has several basic and advanced examples to help you get started.
Migrating from RPI.GPIO
Download the free PDF, keep it open, and stop wasting time on Google.
Download now
If you are familiar with RPI.GPIO library, you might have noticed that GPIO Zero is rather different.
GPIO Zero takes an object-oriented approach, and instead of dealing with individual pins, you will often deal with defining objects that refer to a component or device and then using them via different functions.
For example, to turn an LED on in RPI.GPIO, you will use a program like this:
import RPi.GPIO as GPIO

GPIO.setmode(GPIO.BCM)
GPIO.setwarnings(False)

GPIO.setup(2, GPIO.OUT)

GPIO.output(2, GPIO.HIGH)
Here, you have to individually define the purpose of each pin as an input or output and then set the state of that pin to high or low.
However, when using the GPIO Zero library, most of these low-level tasks are automated, and you follow an object-oriented approach of just defining an LED and then using a function to turn it on. You would use a simple program, as shown below:
from gpiozero import LED

led = LED(2)

led.on()
As you can see, GPIO Zero can simplify your programs significantly, and once you get used to it, it can facilitate the programming.
Additionally, the object-oriented approach of GPIO Zero allows you to carry out more complicated programming with much simpler commands. For example, when using the LEDBoard object, you can switch on or off multiple LEDs simultaneously and even use slicing to access a subset of all the LEDs.
from gpiozero import LEDBoard
from time import sleep

leds = LEDBoard(2, 3, 4, 5, 6, 7, 8, 9)

for led in leds[3:]:  # leds 3 and onward
    led.on()
sleep(1)
leds.off()

for led in leds[:2]:  # leds 0 and 1
    led.on()
sleep(1)
leds.off()

for led in leds[::2]:  # even leds (0, 2, 4...)
    led.on()
sleep(1)
leds.off()

for led in leds[1::2]:  # odd leds (1, 3, 5...)
    led.on()
sleep(1)
leds.off()
In my opinion, the best way to migrate an existing program from RPI.GPIO to GPIO Zero will draw a flow chart of the original program and then re-program using the advanced functionality available in GPIO Zero.
You might also like: Yes, you can access your Pi from anywhere. Here's how.
For a much more detailed comparison of the two libraries, you can consult the official documentation of GPIO Zero.
If you have the parts but don’t know how to use them, check out our guide: Raspberry Pi GPIO Basics: Components You Need to Know.
Whenever you’re ready, here are other ways I can help you:
Test Your Raspberry Pi Level (Free): Not sure why everything takes so long on your Raspberry Pi? Take this free 3-minute assessment and see what’s causing the problems.
The RaspberryTips Community: Need help or want to discuss your Raspberry Pi projects with others who actually get it? Join the RaspberryTips Community and get access to private forums, exclusive lessons, and direct help.
Master your Raspberry Pi in 30 days: If you are looking for the best tips to become an expert on Raspberry Pi, this book is for you. Learn useful Linux skills and practice multiple projects with step-by-step guides.
Master Python on Raspberry Pi: Create, understand, and improve any Python script for your Raspberry Pi. Learn the essentials step-by-step without losing time understanding useless concepts.
You can also find all my recommendations for tools and hardware on this page.


