Multiren

[Edit] 141001: Clarified the sentense “Click your way to the end” to “Click your way to the end through all the requests”

It’s a very simple task to download icons for MorphOS: you just use a *.png file and rename it to *.info and presto, it becomes an icon. But it’s not as simple when you have tons of files you want to rename from PNG to INFO. Doing it one by one is time consuming. This is where Multiren by Onyxsoft comes in. The name is short for “Multi renaming (tool)”. It does what it sounds like: renaming a lot of files in one sweep. You can download the program here (direct link). The program is “registrationware”. If you don’t register (it’s free) you will be reminded to do so every time you use the program. So please do. Put the program where you want. Next we need some PNG files. I’ve got some that needs to be renamed: icons_png Note that they are all called “something.png”. Next we start Multiren: multiren_start We click on Add at the bottom and choose Directory. Then we click on the drawer where the above PNG files are: multiren_loaded Note that New name is the same as Old name. To change that we right click –> Tools –> Extension Editor… : multiren_extension_editor2 Here you can change what kind of files should be renamed into what. We go down to .png. Next to it is also written as png. Mark that line: multiren_png_png Go to Extension on the top right. Rename png to info and press enter (note, it won’t work if you don’t press enter!): multiren_png_info Next you press Change and Close. Now it should look like this: multiren_info_info Next click on Rename. Click your way to the end through all the requests and tadaa, all your PNG files are now INFO files: icons_icons Of course, you can use Multiren for all kinds of file extensions (like renaming mod.* to *.mod which I also do sometimes). There are quite a lot of options in this program worth checking out but so far this is the only function I have been using. It helped me renaming some 400 PNG files into INFO files within a couple of seconds! If you have the files in several different drawers, you can choose Recursive dirs instead of Directory when pressing Add (see above). Then it will load all the subdirectories as well in the choosen drawer. You can also add several different drawers as well by pressing Add several times (you will be asked if you want to clear the list first).

Posted in Uncategorized | Tagged | 2 Comments

Turning MOD:s to MP3

[Edit] Found a better method! Both work but I recommend the latter.

For me “Amiga” is as much a culture as a computer series and design philosophy. This includes its most popular games, the demo scene and, of course, its music! Being able to play 8 bit sound in 4 channels was unheard of in a personal computer in 1985. The years passed and when Commodore went belly up in 1994 they hadn’t changed the design at all for 9 whole years. This can either be proof of how cheap they where; not investing in its computer line. Or it can be proof that this was still in the early 90’s pretty darn good for a personal computer. I think both statements are equally true.

Today I’m pretty happy they didn’t change the design. OK, if Commodore had survived and still produced the Amiga they would have had to up the hardware and given the computer a true 16 bit, 32 channel sound chip. It would have kept it competable but the Amiga would have also lost that certain sound so much associated with the Amiga. The sound of a really good module! The limitations is thus what makes the Amiga sound what it is and I still listens to them: some 25 years after hearing the very first one.

Of course, as times went by other technologies took the spotlight and now we have MP3 and pocket music players. And they can not *surprise surprise* play modules. If we want to play our favourite songs in our pocket players we simply have to transform our MOD:s to MP3:s.

First we need some modules. I want to recommend the Mods Anthology that comes as a 4 CD collection. That’s a hell of a lot of modules, and they have been collected over a period of seven years. Putting personal taste aside, you can at least be sure of that the untold number of crappy songs that do exist isn’t included. You can download the 4 CD:s as ISO files here (it took me about an hour for all four files):

mods_anthology_net

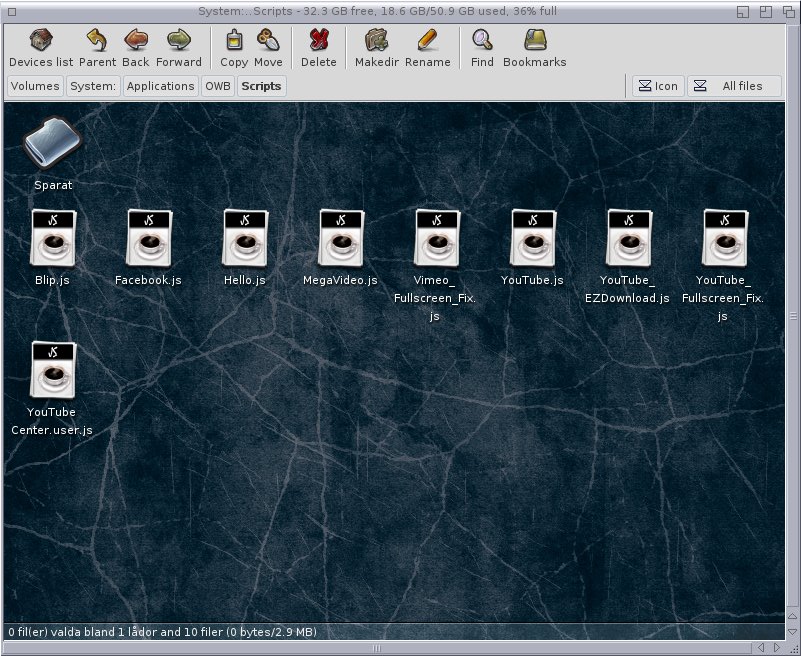
When you are done you can just double click on the ISO and look for a nice module to copy. I found one I liked a lot (note how small in size it is):

smt_judgement_day_download2

Judgement Day by SMT. I want this in my music player so I copied it for convenience to another partition I have named Depot:

depot_smt_judgement_day_mod

In a perfect world we would have a MOD –> MP3 program already but sadly we don’t. So instead we need to turn it into a WAV file first. For that, we use Aminet Radio. You need to download the program either here or via Grunch (using Grunch is highly recommended. Read more about it here). And you also need the additional MOD player that you can download here or via Grunch.

Please do yourself a favour and use Grunch!

Once you have it installed you should be able to play the module like any other MP3 file:

aminet_radio_smt_judgement_day

Next, right click on the player and choose Control –> Save audio output as wave:

aminet_radio_smt_judgement_day_wav

You can choose in the settings where you want the WAV to be saved (Savers –> Save directory):

aminet_radio_settings

If you have the Repeat function on it will keep recording until you uncheck it or click stop. This is a pretty good thing if you have a very short MOD and you want it to loop a couple of times. Otherwise, make sure it’s off.

The song needs to be played from beginning to end which takes us over 7 minutes. Then the song stops (I have repeat off) and we suddenly have a WAV of about 76.5 MB in size. The song will either be named the same as the original file, or if it doesn’t work it will be named just “.wav”. I renamed the file afterwards:

depot_smt_judgement_day_mod_wav

Now we are halfway there. Next we need an encoder. I recommend Lame, which you can read about here (including how to download it). Once you have downloaded and installed it we start a shell (Right click in Ambient –> Ambient –> New shell). We go to where the file is and start writing the Lame command:

shell_smt_judgement_day_lame

I recommend the above command (lame -h wavfile.wav mp3file.mp3) since it gives a good compromise between size and quality (especially considering that modules have pretty low sound quality to begin with). There are plenty of settings to play with though (write lame –help or lame –longhelp to see them. Note that there are two short dashes and not a long one). We are happy with this though so we press enter:

shell_smt_judgement_day_encoding_mp3

This means we are encoding it into MP3. After a couple of seconds (depending on your hardware) we are done and we now have an MP3 of about 7 MB in size:

depot_smt_judgement_day_mod_wav_mp3

And now we are done! Just e-mail it to yourself, use a USB stick or whatever, put it in your portable MP3 player and party like its still 1989!

A note though: some modules doesn’t work that well with Aminet Radio and the WAV file get some odd behavior. In the case of this song, some time at the end the pacing gets messed up which is a shame. Most modules works nicely but not all. So I still hope there will one of these days someone will make a nicely working MOD 2 MP3 converter. Maybe a good project for a beginner Hollywood programmer?


[Edit]

It didn’t take more than 5 minutes before a blog follower enlightened me via IRC of a better method. It’s a little more complicated, but it will give you much better results.

For this you need a program named UADE, which is basically an UAE Amiga emulator with only sound. I use it to play modules but up until now I didn’t know it could convert to other formats. You can download it from here (not via Grunch). Place it where ever you want.

Then you need another program named SoX. This is a sound file converter. You can download it from here (this not via Grunch as well). After you download it, open it and place the file called sox in c:

You also need Lame. If you still don’t got it, go back and read again on how to download and use it.

We will start shell again and go to the UADE drawer. Then we will write:

uade -P players/PTK-Prowiz -M depot:Judgement_Day.mod -outpipe 1 >depot:smt.raw

I choose a new name so we can tell the files apart.

Let’s take a moment to see what PTK-prowiz is. It’s the player used for playing Protracker files. There are a lot of players in the UADE player drawer to choose from since Amiga have a whole lot of music formats. Very useful, but it can also be quite confusing of course.

Now we will have a RAW file. If you try to use Lame here the end result will sound terrible. We need to convert this to a WAV. Write in the same shell:

sox -u -b 16 -r 44100 -c 2 -s depot:smt.raw depot:smt.wav

Now we will have a WAV file. The only thing left is to encode it into MP3 like above:

lame -h depot:smt.wav depot:smt.mp3

Now this drawer should have 6 files:

depot_six_files

Even though the first method of converting is simpler, the second one has a much higher chance of giving the correct sound. For this reason alone I must now recommend that you use the second, shell based way.

You learn new something every day!

Posted in Uncategorized | Tagged , | 5 Comments

Election, Amiga Forum and switching DVD device.

Today is election day in Sweden. I’m watching the events unfold and it looks like we will have a change of government: from an alliance of conservatives, pseudo-liberals, Christians and farmers party turned Randian capitalists turned back to farmers party to an alliance of social democrats, socialists and the green party. The feminists have grown but doesn’t seem to make it all the way into government. And the “not racist but …” party Sweden democrats will apparently become the third biggest party in Sweden.

Is this good news or bad news? I have no idea. I’m not really happy about the last party I can tell you at least.

One reason I haven’t written in this blog for a while is because I have been busy with the latest issue of Amiga Forum. It’s a printed Amiga magazine in Swedish, well, the only printed Amiga magazine in Swedish actually. Pretty soon the latest issue will go to the printers and this is the latest draft of it’s front cover:

Amigaforum10_cover_draft_2But I do think it’s time to do some MorphOS stuff too! So I decided to work on a problem I’ve been having for several months now. The problem is that my DVD-RW device in my G5 doesn’t burn and I have not been able to fix it. I got it to work with Frying Pan (a burning program no longer in development), but Jalapeno (the standard MorphOS burning program) claims it burns everything successfully but afterwards it doesn’t read at all. More interestingly, when I burn a CD-RW and try to burn it again in Windows it doesn’t even read as have been burned at all, only erased. I have asked the MorphOS Team for help but so far I haven’t found a solution.

Yesterday when I was at SUGA, the guys had brought a PC with them to rip for spare parts. No one wanted its IDE DVD-RW so I took it. Even though a G5 uses SATA, the CD/DVD-ROM is always IDE. Basically, it should work. So today I opened up my G5 in order to switch devices:

Opened_G5On the top left you can see the DVD-RW-ROM: It’s quite easy to take it out. First you remove the plugs holding it in like seen in the picture below:

dvdrw_plugs_openedNext you need to remove the power and the IDE cable. It was stuck in the device with some sort of sticky tape which was a hazzle to remove. But finally I got it out:

no_dvdThis is the old DVD-RW-ROM:

old_dvdNote that it’s just an ordinary DVD-RW-ROM with an ordinary open button. It’s only because of Apple policy of not using buttons unless you really really have to that you can’t use it and must use it in the OS instead. This is of course a good thing anyway since it doesn’t look like a normal DVD-RW-ROM but actually is, like my new one:

new_dvdBut before we put it in you need to take the 4 plug screws on the bottom of the old device. Without these, the DVD-RW-ROM won’t stay still in the machine:

dvd_bottom_screwsThe picture is blurry, but I think you can see the 4 black screws. It required a little force to remove but it was easy to switch. There are holes for this on the new device as well.

I put it in, attach the power and IDE cables, plug it so it sits steady and now we are done. I close the computer and start MorphOS.

But, as it turns out the tray is too tall to open inside a G5. It just get stuck. A quick comparison shows that the tray of the old one is a lot shorter. I need to cut the new one in order to get it to work. So I decided that before doing that I should try out the new device and see if it works. I open the computer up, remove the plugs while keeping the device plugged in and start MorphOS again. I put in a CD-RW and let Jalapeno burn:

dvd_burningAnd it doesn’t work. As it turns out I get the exact same problem with this device as the former one. So it adds to my suspicion that there is some bug in Jalapeno. I don’t need to to burn a lot, but it is quite annoying not being able to do something so basic nowadays. And since this device can’t open the tray as you should I decided to go back to the old one. Sadly, this time I can’t get any program to burn anything. Before, I was able to burn a CD-RW (but not a CD-R) when I choose 8X speed but now it keeps burning in 10X+ speed anyway, which makes the disc unreadable. Frying Pan is also broken now for some reason. I have to burn in Windows from now one I guess.

Though this was a failure at least I learned something about how to switch CD/DVD-ROM:s in a G5. It’s at least something.

Posted in Uncategorized | Tagged , , , | 1 Comment

Youtube & Youtube Center

Youtube is the worlds most popular free video sharing service. And it’s owned by Google who tries to make it profitable by showing commercials. This was until lately dependent on Flash technology, and it still is to a big degree even though it’s migrating to HTML 5. This is good news for Amiga platsforms, which lack Flash. However, because there are a lot of programs out there that circumvent Flash and shows the movies directly (without the commercial) Google looses money. So Youtube keep change it’s code in order to make these programs useless or at least less useful. In most cases they are unsucessful since tousands of users work hard to keep up, fixing these problems in minutes. But with MorphOS, we only have one user working on this (Fab) and he has a hard time keeping up (on a related note, you can no longer log in to Youtube with OWB for some reason).

Not long after OWB 1.24 was released the Youtube scripts stopped working for me. This seems to be different from person to person so if your scripts are still working, then congratulations. For the rest of us, we need another solution. And there is one: Youtube Center.

Youtube Center is a script, just like Fab’s, but it’a also a lot more advanced and heavy on the load. The upside though is that it works really well, gives you a lot of extra features and has not failed yet even once.

First, you need to go to Youtube Center’s homepage and download the script (download directly here):

ytc_hp

Copy the script to the Scripts drawer in OWB:

owb_scripts

Start OWB. Right click –> Window –> Script:

scripts_in_owb

Click on the Add button at the bottom left. Add the script. Then click on Youtube HTML5 Converter and uncheck Allow at the bottom left. Do the same with Youtube – EZ Download. Both these scrips need to be disabled (you can also delete them if you want). Now it should look like the picture above. Close the window.

Now let’s go to Youtube.com. You should automatically be asked to set your Youtube Center settings. If not (or if you accidently click the settings away) you can go to the settings by clicking on the cogwheel at the top right on the screen. But before that, you most probably need to spoof as another browser. Right click –> Settings –> Identify as –> choose browser. For me, Internet Explorer 10 works best:

ytc_settings

There are a lot of settings. You will have to test it in order to find the best possible setting. Having low standard setting is smart, and don’t that there is settings for downloading movies as well (which is why we no longer need the EZ Download script). You can also choose the standard size of windows which is also useful even though not perfect. Once you are happy, you just need to close the script (it will save automatically) and go look for something fun to see:

working_youtube

Spoofing as Internet Explorer 10 it will first tell you you need Flash installed, but then suddenly the movie loads and starts playing (autostart is on). It’s almost as uncomplicated as looking at Youtube on a Windows computer (almost). Not a perfect solution but it works and will be necessary until Youtube stops being so damn difficult.

Note: For some reason the download bar etc doesn’t show up anymore. I have contacted the author about it. Stay tuned in case there is a quick solution.

Posted in Uncategorized | Tagged , , | 2 Comments

Odamex 0.70

[Edit] 2014-08-27: Changed some things about ag-odalaunch. More information below. 2014-08-28: Made it clear that I was talking about an A1200 when playing on a classic Amiga.


Remember Doom? Of course you do. This first person shooter (FPS) may be the one game that killed off the Amiga. When the Amiga was concieved in 1982 sidescrollers was the big thing. May Miner and his team made sure it would be a killer in this field. In 1993, more and more people was looking for a home computer and despite the higher price they went and bought a PC; the same machine they used at work. This might have started a fight with their kids when games came into mind. If the Amiga was still cool the parents might have bought an Amiga instead. But then came Doom and it was a game changer. Now both parents and kids wanted a PC. It was a devastating blow. Several companies tried with varied success to compete with Doom by making their own clones for the Amiga. But it was too late. Those FPS games might have delayed the switch to PC for several Amiga owners but few PC owners switched to Amiga. Doom was simply too good. It was the original every other games was compared to. Despite a lot of begging from Amiga users to ID Software to port the game they simply didn’t see the point.

Porting Doom to Amiga later became a holy cow for Amigans who wanted to prove that the Amiga still could. Technically Doom was not out of Amigas reach. With a rather cheap 68030 based acceleration card and some extra RAM it would be quite playable on an A1200. There are today several working ports of Doom to classic Amiga, something made easier when the source code was released in 1997. By then Quake had been released (in 1996 by the same company) and that game was way out of Amigas reach. Only with expensive hardware like a 68060 or PPC acceleration card, plenty of RAM and a graphic card could you play that game. Quake was eventually released on Amiga in 1998 by ClickBOOM, but by then people had lost interest in proving that Amiga still could. If Quake was the last nail in the coffin, then Doom was the 3 before that. Amiga had been dying off for a while even before Doom, but that game removed the Amiga as the number one gaming computer and put the PC there instead.

Doom-2-screenshots-3

The reason Doom killed of the Amiga was, quite simply, because it’s a really good game. I remember going to my friends house to play it all the time. I still think it’s fun to play, over 20 years later. And of course, there are several working ports for MorphOS. A couple of days ago BSzili ported the latest version of Odamex (0.70). And we are going to test it today.

First, download the port here (there are also ports for AmigaOS 4 and AROS at his homepage). Then unpack it and place the folder where you want it. Next you need some working WAD files. These files contain the game data you need to play anything. Not all WAD files works with Odamex, but In have tried these sucessfully:

  • Doom1.wad
  • Doom2.wad
  • Plutonia.wad
  • Tnt.wad
  • Freedoom.wad

Doom3.wad works but is quite buggy. The rest work without a hitch. The first four on the list are commercial and you need to either get yourself a legal copy of them or download them illegally and risk lenghty prison terms. Or the very least a slap on the wrist. You can also download Freedoom which gives you all new graphics but more or less the same game, for free:

Freedoom

There are plenty of fun looking WAD files out there, but these are the only ones I have gotten to work.

Just copy the WAD files to where you want. I copied them all to the Odamex drawer, except the Freedoom version that I gave it’s own drawer. Apparently, it needs to be named doom.wad to work so it needs it’s own drawer.

Next we start Shell and go to the Odamex drawer. Type: odamex -iwad name.wad or odamex -iwad freedoom/doom.wad. You can also just double click on the Odamex icon. It will then start the Doom2.wad file automatically. There is also another icon called ag-odalaunch that makes it possible to battle with others online. But since that isn’t my thing I havn’t bothered trying it. Type like it says above and press enter.

[Edit] BZsili corrected me here and told me that you could use ag-odalaunch to start single games as well. You can either select Action –> Run Offline and then chose the WAD you want to play. Or you can just press the big yellow circle in order to do the same thing.

The game will start in it’s own window. The default options was not optimal for me so I changed them in options. The good thing about Odamex is that if you change setting in one game (.wad) it will apply for every other games as well. I got some flickering when using non-32 bit screen in 640×480 in fullscreen but changing to 32 bit in 1024×768 (Video Mode option) solved it for me. I also changed the controls to suit me better. Pretty simple. Now it’s time to play!

The games workes without any problems and I have not had a single crash. I also went and tried the classic cheats idkfa (all weapons and keys) and iddqd (God mode) and they worked as they should (I used to love to cheat!). Yes, Doom still is a very good game indeed, and when I play it I remember why PC users loved it so, and why Amigans used to fear it so much.


Don’t forget that this is the last week you can donate to the developers foundraing that is going on at WArMUp. Go there and donate some spare change!

Posted in Uncategorized | Tagged | Leave a comment

Gish

Gish

Imagine yourself being a ball of tar, and suddenly you have to rescue your lady friend who has been kidnapped by some dark fiend. Into the forgotten sewer world you go and use your tar-ness to your advantage!

This cute 2004 indie game by Alex Austin was open sourced on 29th of May 2010. A week later a MorphOS port was made. Gish is a platform game where you roll around and try to complete enviromental puzzles and defeat enemies unarmed. To this end, you have 4 powers:

  1. Stick. You threw out spikes all over you in order to stick to most surfaces.
  2. Slide. You make yourself slippery so you can flow through small spaces.
  3. Heavy. You turn solid. Good for breaking stuff.
  4. Jump. You jump (duh!). Pressing the jump button in a timely fashion makes you jump higher.

The goal is to go from start to finish, alive. You collect coins and extra lives and defeat or avoid enemies. You have a health metre that starts from 100. You also have a timer. You get extra points for beating a level quickly. There are also plenty of secrets apparently, but I have yet not found even one.

This is what level one looks like:

gish_level_1

It’s really simple to get into the mechanics of the game. The enemies I’ve encountered range from small doggie like creatures to huge humanoids (so far I’ve played):

gish_monster

But they are not too hard to defeat (in the beginning that is):

gish_monster_defeated

And so this goes on. More puzzling environments, more enemies, more fun! Though the game is open source, the graphics and music etc are not. You still have to buy a copy. But there is a nice surprise waiting for you at the seller Chronic Logic homepage. You can pay how much you want. If you are cheap, 1 dollar or less is enough. For a direct download I thought 5 dollars was a fair price. Follow the instructions and buy yourself a copy (remember that Paypal doesn’t work with OWB at the moment due to the heartbleed business). You will get a mail with a download link and a code (that works for endless downloads. But don’t be a jerk and pass it along). For MorphOS, be sure you download the Linux version. If you do, you don’t have to install the game on another machine first.

Next, go to MorphOS Files and download the MorphOS executables. Then you unpack the original game to whereever you want. And after that unpack the MorphOS executables and copy the files over the original game. Now it should look something like this (show all files):

gish_drawer

Now everything should work (yes, no hazzle!). Double click on the SDL marked Gish icon and the game is on. You can also go to the option menu to go full screen. Since I have a G5 with a pretty fast Radeon X800 graphic card I can go 1920×1200 in 32 bit without any lag at all. The game runs pretty nicely even on slower computer as well. But it doesn’t work on an Efika 5200b due to lack of memory (256 MB is probably the minimum). You might experience some minor graphic glitches but none that should bother you while playing.

Note, the demo version does not work with the MorphOS port. You need the full game.

Commercial games on MorphOS are a rarety. Good ones doubly so. Gish is a very simple game, and the graphics is also simple but pleasing looking which fits its indie background. The music is repetative but gives this feeling that this is what platform game music is all about. If you like cute platform puzzle games with plenty of humour then you should do yourself a favour and buy yourself a copy of Gish!

Posted in Uncategorized | Tagged | Leave a comment

Ripping and encoding MP3 with Flacapella

Flacapella is a ripping tool that comes with MorphOS. Even though it’s meant to rip CD:s and encode the songs as FLAC files it works with just a few tweeks as an excellent CD to MP3 ripper & encoder.

First you need to download an encoder. I recommend LAME which is an open source MP3 encoder/decoder ported to MorphOS (there is also a version for G3 processors and Efika which you can download here). Extract the file and copy the correct file (there are two to choose from, read the manual) to C:.

Next we need a CD. I choose the soundtrack of The Last of US (a game I love!):

The_last_of_us_soundtrack

Lets insert the CD and start Flacapella. The program will scan the CD automatically:

flacapella_cd_read

Rip (at the bottom right) will only rip the music as WAV. Rip & Encode will of course do what it sounds like. But since we want to rip the files as MP3, we need to right click –> Settings –> Settings:

flacapella_settings

Since it was a long time ago I changed my settings I don’t remember how it originally looked like. The top settings are pretty self explanatory. You can also play around with File Name Format pretty easily (just click on the arrow to the right to see all possible settings). Audio Ripping Mode is set to the safest possible. Take a look at Encoder. It’s this one we are going to change: from Flac to Custom.

Next I change the Compress Command to C:lame -h -b 192 {input} {output}. -h means that it’s quality 2 (where 0 is the best and 9 is the worst) and -b 192 means that the bitrate will be 192. Not the best sound quality but still pretty good. We don’t want the files to be too big either. File Extension will of course be mp3. Lets save.

Now it’s time to rip and encode:

flacapella_ripping

It rips and encodes at the same time. The list gets shorter as it all progresses. With my G5 at 2.7 GHz encoding to MP3 only takes a couple of seconds. After a while, it’s all done:

the_last_of_us_ripped

And we are done! It’s time to enjoy some music!

aminet_radio-the_last_of_us-home

Posted in Uncategorized | Tagged | 2 Comments

Changing icons while keeping tooltypes

Yesterday, I got a tip from Grzegorz Kraszewski about how to change icons without losing your tooltypes. Tooltypes are information stored in ICON files, like if the program will start in fullscreen and things like that. Not all programs use them but plenty do. However, when you copy an icon over another the new icons tooltypes will be transfered, if it even has any. In other words, you will loose all the settings your or the program have made.

Here is how you can change an icon while keeping all the tooltypes.

First we find a suitable icon. Remember that is has to be an INFO file and not a PNG. If you use a PNG file it will not work. So make sure you rename the PNG file to .info first:

icon_drawer

I copy the program GMPlayer to RAM: for this experiment:

ram_mplayer

I right click on the icon and choose Information…:

ram_mplayer_before

There is a lot of tooltypes in this program. Now I draw the desired icon from the drawer (first image) to the icon above (right above where it says PNG icon):

ram_mplayer_after

Now you just press Save and now your program should look like this:

ram_mplayer_new_icon

Pretty neat! If you now right click in the icon and choose Information… again all your tooltypes should still be there.

This is of course quite time consuming if you want to change a lot of icons, but still; it’s good to have this posibility at all. The old Amiga Workbench wasn’t able to so I had to rely on third party software. So thanks again for the tip!

Posted in Uncategorized | Tagged | Leave a comment

Adding drawer icons in menu

One function I miss in MorphOS is the ability to add icons for programs/files that lack them. Since MorphOS already can recognise what kind of action should go with what kind of program or file this feature should be not to difficult to add (I hope some of the developers see this and consider it).

But you can actually have the ability to add drawer icons. And this is how I’ve done it.

First, right click in Ambient –> Settings –> Ambient Settings –> MIME:

amibient_settings

Click on Internal:

mime_internal

Doubleclick on x-morphos-globalaction-directory:

mime_directory_edit

Now lets click Add…:

mime_add_drawers_setting

I give it the name Add Drawer Icon. Then I click Add… on the right. I choose it as an AmigaDOS program and write the arguments as shown above. The last part: %sp.info, specifies that it will keep the original name of the target file but add .info to it. This mean that it won’t copy over the drawer with the icon, but create a new file with the added ending .info (unless there exist an drawer icon, in which case it will overwrite it). So don’t get it wrong. I choose it as a Menu in Event Type.

If you look at the icon that will be added, then you might notice that it’s not a standard icon. I have changed all the default icons, which is very easy. You just right click in Ambient –> Ambient Settings –> Miscellaneous (or something like that) –> Predefined icons. Here you can change the path if you have an identical set somewhere else. This is the original folder (moved to a different location for convenience):

original_def_icons

And here are my default icons:

def_icons

Here you can see the drawer add_drawer(.info) that I added for this purpose. OK, now we have edited the settings as above, lets save and try it out.

I have created a drawer in RAM: without an icon:

ram_no_added_drawer

I mark the drawer Unnamed and click on the right mouse button:

menu_add_drawer

And there it is. Click on Add Drawer Icon and now RAM: should look something like this:

ram_added_drawer

When we now change view mode to Icon + Icon (= icons only) then this is what we see:

ram_only_added_drawer

A very practical solution indeed.

Just a note: when you create a drawer and you add an drawer icon at the same time MorphOS will automatically choose the def_drawer icon. My def_drawer and add_drawer icons look different, so what I do when I create a new drawer is to use Add Drawer Icon as above on that file as well. Then the old .info file will be replaced with the add_drawer icon (like I mentioned above already). This can of course be done to any drawer.

A good thing is that you can’t do this on any other, non drawer files by mistake. Add Drawer Icon simply doesn’t show up.

If you need some icons, then it’s good to know that any PNG picture turns into an icon if you rename the file from name.png to name.info. There are plenty of icon packs out there in PNG format so you should have no problem googling it. My icons are called BUUF and GANT and are made by Mattahan. The icons I’ve used are spread all around the Internet so you may have to look for it a while to find them. Some icons are made/modified by me as well. I may upload them in the future if I can get the blessing of the author.

One last word: don’t forget the ongoing fundraising at WArMUp to support our software developers. Any spare change is very welcome!

Posted in Uncategorized | Tagged | 4 Comments

SSD and MorpOS 3.7 released

INSTALLING AN SSD ON MY POWERMAC G5

I have been looking for an SSD for my PowerMac G5 for a while now, and I finally got my hands one one. The problem is that the G5 uses SATA 1, and most SSD today are SATA 3 and only a few are backwards compatible all the way to SATA 1. The best solution is to look for a used SATA 2 disk that works with SATA 1. I asked around and got suggested to look for an Intel 320 series SSD. They are to 95% compatible with SATA 1.

Luckily, I did find one pretty close where I live and also for a pretty good price (about 70 Euro). So I opened up my G5 (doing that is very easy):

g5_opened

You can see my hard drives on the top right:

hard_drives_before

I have two hard drives, but only the lower one is being used (I havn’t bothered getting the top one to work). I remove it, which is also pretty easy and then I insert the SSD in the same slot. Just look at how different in size they are:

old_disk

ssd

And the SSD is also a whole lot thinner and lighter. Lets plug it in:

harddisk_after

Pretty simple. After that it’s just a matter of closing up the G5 and start the standard installation process (I usually use the CD, it’s much more reliable than the USB installation solution). The installation worked without a hitch. Then all thats left is to use my fresh backup and get my computer as it was. This is of course the part that take the longest time to finish (over an hour for some 60 GB of stuff). The good thing about MorphOS is that you don’t need any backup program. Just copy everything from one drive to the next:

installing_morphos

Then I reboot, and everything looks like before. Except that my new drive is only about half the size of my old one. But that doesn’t bother me, I still have plenty of space left.

So how much faster is an SSD then? Sadly, I don’t have any benchmarks so I have to go with what I see. SATA 1 is capable of a 1.5 GB/second file read (3 GB/ second for SATA 2 and 6 GB/second for SATA 3) which is a lot faster than any standard SATA hard drive. MorphOS does boot up a lot quicker, even though MorphOS was quick before too. I only get a glimpse of the boot pic before everything has started. Loading the background picture is also noticably faster. But the place where an SSD really gets to shine is where you list a drawer with a lot of files: here it simply flies! Starting programs is also a little faster.

But when I try to start Jedy Outcast it’s doesn’t load faster at all. This is for the simple reason that it’s a very CPU heavy load and therefore has nothing to do with the speed of the SSD. This was pretty much expected.

So is this a good buy? It depends. MorphOS is a very lean OS in itself so you don’t get that much speed improvement as you would with Windows, MacOS or Linux. But it does get noticably faster, and in some cases a whole lot faster so if you have the opportunity to get an SSD for a good price, I think you should go for it.


MORPHOS 3.7 RELEASED

Just in case you have missed it, version 3.7 of MorphOS was released today. This is a bugfix version so there is no new stuff this time. You can download it from here.

Posted in Uncategorized | Tagged , , | 4 Comments