Menü
Microbots
0
  • Machen
    • Erste Schritte
    • Maker-Builds
    • Ausbildung
  • Geschäft
    • Maker-Module
    • Werkzeuge und Ausrüstung
    • Roboter & Displays
  • Um
    • Unsere Geschichte
    • Kontakt
    • FAQs
  • Einloggen
  • Deutsch
  • Ihr Warenkorb ist leer
Microbots
  • Machen
    • Erste Schritte
    • Maker-Builds
    • Ausbildung
  • Geschäft
    • Maker-Module
    • Werkzeuge und Ausrüstung
    • Roboter & Displays
  • Um
    • Unsere Geschichte
    • Kontakt
    • FAQs
  • Sprache

  • 0 0

CodeCell: I2C-Kommunikation

I2C ist ein weit verbreitetes Protokoll für die Kommunikation mit Sensoren, Displays und anderen Peripheriegeräten. CodeCell vereinfacht die I2C-Kommunikation, indem es den I2C-Bus bei der Initialisierung automatisch konfiguriert, sodass Sie ihn sofort nutzen können.

I2C-Pin-Konfiguration

Die SDA- und SCL-Pins des I2C befinden sich auf der Unterseite der CodeCell-Platine.

  • SDA (Datenleitung) → GPIO8
  • SCL (Taktleitung) → GPIO9
  • Geschwindigkeit → 400 kHz (Schnellmodus I2C)

CodeCell konfiguriert I2C automatisch in der Init() Funktion und diese Konfiguration kann nicht geändert werden, wenn Sie die integrierten Licht- und Bewegungssensoren verwenden möchten, da diese an denselben I2C-Bus angeschlossen sind.

Die folgenden Onboard-Sensoren verwenden bereits I2C. Achten Sie daher darauf, beim Anschließen anderer I2C-Geräte wie Displays, zusätzlicher Sensoren oder Module nicht dieselben Adressen zu verwenden :

Sensor Adresse
VCNL4040 (Lichtsensor) 0x60
BNO085 (IMU – Bewegungssensor) Version: 0x4A

Hinweis: Wenn ein neues I2C-Gerät dieselbe Adresse wie einer dieser Onboard-Sensoren hat, kommt es zu Konflikten und Sie erhalten möglicherweise falsche oder gar keine Daten.

Eingebaute I2C-Pull-up-Widerstände

Um eine stabile I²C-Kommunikation zu gewährleisten, verfügt CodeCell bereits über 2-kΩ-Pull-up-Widerstände, die an die SDA- und SCL-Leitungen angeschlossen sind. Das bedeutet, dass Sie bei Verwendung externer I²C-Sensoren keine externen Pull-ups hinzufügen müssen .

Lesen von Daten von einem I2C-Gerät

Verwenden Sie zur Kommunikation mit einem externen I2C-Gerät die Standardbibliothek „Wire.h“.

Im Gegensatz zu Standard-Arduino-I2C-Geräten verfügt CodeCell über mehrere integrierte Sensoren auf demselben I2C-Bus. Der Aufruf Wire.endTransmission(false); stellt sicher, dass der Bus aktiv bleibt und die integrierten Sensoren ordnungsgemäß funktionieren.

Beispiel:

 Wire.beginTransmission(SLAVE_ADDRESS); // Start communication with the device
 Wire.write(SLAVE_REG); // Send the register we want to read
 Wire.endTransmission(false); // Don't release the bus (needed for onboard sensors)
 Wire.requestFrom(SLAVE_ADDRESS, 1); // Request 1 byte from the slave

 if (Wire.available()) {
 uint8_t data = Wire.read(); // Read received byte
 Serial.println(data);
 }

Abschluss

CodeCell konfiguriert den I2C-Bus automatisch, sodass keine manuelle Einrichtung erforderlich ist. Außerdem konfiguriert es automatisch die integrierten Sensoren und unterstützt zusätzliche I2C-Geräte!

  • Teilen:

Sozial

Github

  • Um
  • Software
  • Ausbildung
  • Kontakt
  • FAQs
  • Bedingungen
  • Rückerstattung-Politik
  • Datenschutzrichtlinie

Erfahren Sie als Erster von neuen Projekten und sichern Sie sich spannende Angebote!

© 2026 Microbots.

★ Reviews

Let customers speak for us

49 reviews
Write a review
84%
(41)
4%
(2)
2%
(1)
4%
(2)
6%
(3)
21
45
G
MotorCell
Gerald Kendrick

Very happy with my MotorCell. I'm incorporating it into a prototype project that will hopefully result in me needing a few more!

User picture
A
CodeCell C6 Drive
Anonymous

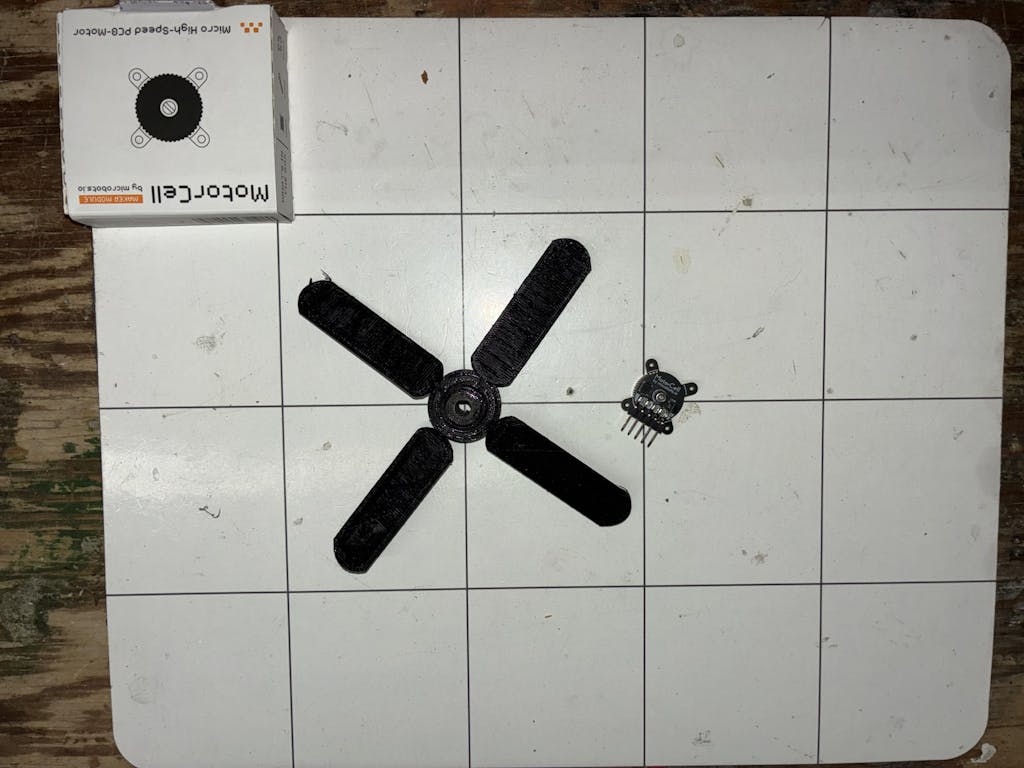
Great product! Having the IMU, motor driver, and battery management directly on the board is incredibly handy for quick prototyping. Love it!

Improvement ideas:
- using an ESP32 other than the C6 to get more cores. On a single-core chip, WiFi tasks often interfere with real-time applications.
- adding two more motor drivers (with a slightly higher current rating) would be awesome for drone projects!
- I know the compactness of the board is a huge selling point and really optimised, but exposing a few more pins would be great. With the motor drivers already occupying 4 pins, having only 4 GPIOs left can be tight for complex projects (though I’m nitpicking, I’m really pushing this board to its limits!).

A
CodeCell C6
Anonymous

I use CodeCell C6, like all the Features, and compactness. The remote Link to the iPhone with some Controls for 2 Motors is just perfect for the job.

O
CodeCell C6 Drive
Odd_Jayy

This is one of my Favorite finds, this board has everything you need to make a quick and small robot, easy to set up and install. Perfect for beginners or a person who needs to save room in their build.

User picture
a
DriveCell
arnaubp

Great products!
Well attention to the detail.
They are so so so small :D

123