

First actor/screencap tutorials
2 tutorials. Hope you like!
 to
to 
AND
 to
to 
Made with: Photoshop 7.0. Involves 1 layer of selective coloring for each tut. I think it is compatible based on what I've read in other tuts!
Difficulty: pretty easy, but you should know basic Photoshop lingo/where to find the tools in Photoshop.
Tut 1
Works best on: brighter images, or images that you can easily make naturally brighter. Also works great on actors or characters who have paler, shinier skin.
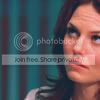
Here's the original image we're working with.
Step 1: Crop the image to desired size. (I lost my original crop of this, so the final version is cropped slightly tighter on her face, but it's the same tutorial.)
 Step 2: This image was a bit dark to begin with so I added a curves layer to brighten it. I used RGB: I: 99, O: 108
 Step 3: Selective color layer:
Reds: C -100, M 0, Y +98, B 0
Neutrals: C +55, M +71, Y +100, B +7
Step 4: Create a new layer and fill it with a dark blue color (I used #002441). Set to exclusion.
That's it. Flatten and you're done!
Other images I've used this on (with slight variations on the curves layer):


---------------------------------
Tut 2
 or
or  or
or
Works best on: Darker screen caps. I use a version of this on tons of my House icons because House caps tend to be dark.
Here's the original image we're working with.
 Step 1: Crop your base. Add Curves Layer or Screen layers if necessary. I created a curves layer and bumped up the RBG and bumped down the blue and red slightly. These are specific to each picture so you'll have to play around with the settings on your own until the image is to your liking.
 Step 2: Add a brightness/contrast layer with the contrast +33.
Step 3: New Selective color layer:
Reds: C -54, M +29, Y +48
Neutrals: C +58
You can flatten the image as is or move on to the next step.
Step 4: Create a new layer and fill it with a dark maroonish purple (I used #4F191A) and set to exclusion 100%.
You can flatten it there if you like or...
Step 5: Create a new layer and fill it with a dark blue (I used #132634). Set to exclusion 100%. Flatten the image and you're done!
Other images I've used this on (with or w/o the exclusion layers):


- Kate
See my House Icons | House/Cameron Banners | Stock Icons & Tutorials | Stock Banners
to AND
to Made with: Photoshop 7.0. Involves 1 layer of selective coloring for each tut. I think it is compatible based on what I've read in other tuts!
Difficulty: pretty easy, but you should know basic Photoshop lingo/where to find the tools in Photoshop.
Tut 1
Works best on: brighter images, or images that you can easily make naturally brighter. Also works great on actors or characters who have paler, shinier skin.
Here's the original image we're working with.
 Step 1: Crop the image to desired size. (I lost my original crop of this, so the final version is cropped slightly tighter on her face, but it's the same tutorial.) Step 2: This image was a bit dark to begin with so I added a curves layer to brighten it. I used RGB: I: 99, O: 108 Step 3: Selective color layer:
Reds: C -100, M 0, Y +98, B 0
Neutrals: C +55, M +71, Y +100, B +7
Step 4: Create a new layer and fill it with a dark blue color (I used #002441). Set to exclusion.That's it. Flatten and you're done!
Other images I've used this on (with slight variations on the curves layer):
---------------------------------
Tut 2
or or Works best on: Darker screen caps. I use a version of this on tons of my House icons because House caps tend to be dark.
Here's the original image we're working with.
 Step 1: Crop your base. Add Curves Layer or Screen layers if necessary. I created a curves layer and bumped up the RBG and bumped down the blue and red slightly. These are specific to each picture so you'll have to play around with the settings on your own until the image is to your liking. Step 2: Add a brightness/contrast layer with the contrast +33. Step 3: New Selective color layer:
Reds: C -54, M +29, Y +48
Neutrals: C +58
You can flatten the image as is or move on to the next step.
Step 4: Create a new layer and fill it with a dark maroonish purple (I used #4F191A) and set to exclusion 100%.You can flatten it there if you like or...
Step 5: Create a new layer and fill it with a dark blue (I used #132634). Set to exclusion 100%. Flatten the image and you're done!Other images I've used this on (with or w/o the exclusion layers):
- Kate
See my House Icons | House/Cameron Banners | Stock Icons & Tutorials | Stock Banners