This is a library for an ESP32 web server based controller that anyone can use for their project. It supports 10 buttons, 2 sliders, and 2 joysticks. It provides a customizable controller interface, allowing you to configure buttons, sliders, and joysticks, and save settings both in local storage and EEPROM. It supports multi-touch input, allowing multiple joysticks to work simultaneously.

- Supports Push Buttons and Toggle Switches.
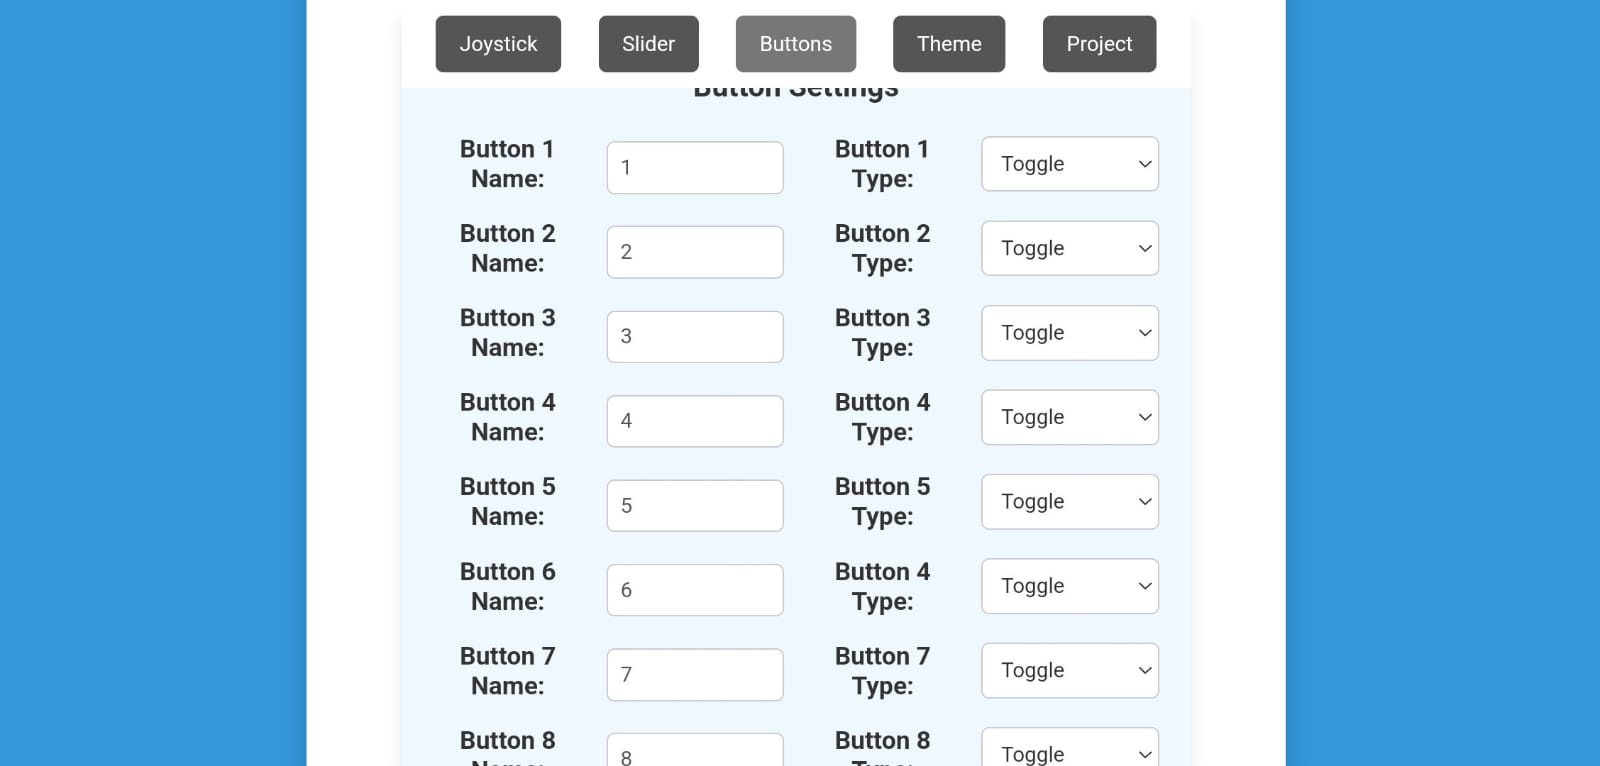
- Easily modify button names and types from the settings interface.
- Customize slider names and ranges to match your project requirements.
- Adjust joystick range settings for better precision.
- Supports multi-touch, enabling both joysticks to work simultaneously.
- Modify button names, types, slider ranges, and joystick ranges through an intuitive settings menu.
- Settings are stored in local storage and ESP32’s EEPROM, ensuring persistence even after resets.
- Once saved in EEPROM, settings remain intact across all devices using the controller—no need to reconfigure for each device!
- A Full-Screen Button is available at the top left of the interface.
- When activated, the controller enters full-screen mode, making it feel like a native app.
- Enhances usability and immersive experience for touchscreen devices.
- Settings are first saved in the browser’s local storage.
- This ensures settings remain intact even after refreshing the page.
- All settings are stored in the ESP32's EEPROM, preserving them even after a power cycle.
- This allows you to use the controller on multiple devices without reconfiguring.
- When the ESP32 is connected for the first time:
- It attempts to load settings from EEPROM.
- If no saved settings are found, default values are used.
- Any changes made are saved both in local storage and EEPROM for persistence.
| Slider Configuration | Button Configuration | Theme Settings |
|---|---|---|
 |
 |
 |
Your Arduino project should be structured as follows: /YourProjectName │── /data │ ├── controller.html │ ├── settings.html │── YourProjectName.ino │── OtherRequiredFiles.ino
Ensure that the data folder contains controller.html and settings.html before uploading files to SPIFFS.
- controller.html: The main interface for controlling the ESP32 via the web server. It contains buttons, sliders, and joysticks.
- settings.html: The settings interface where users can customize the button names, types, slider ranges, joystick ranges, and other parameters.
Here is a visual representation of the project structure:

This library requires the following libraries to work correctly:
- WiFi - For Wi-Fi connectivity on ESP32.
- ESPAsyncWebServer - For setting up an asynchronous web server on the ESP32.
- AsyncTCP - For asynchronous TCP support required by ESPAsyncWebServer.
- FS - For file system operations on ESP32.
- SPIFFS - For managing files in SPIFFS (Serial Peripheral Interface Flash File System).
- ArduinoJson - For handling JSON data.
- EEPROM - For reading and writing to the EEPROM on ESP32.
To use the main library in your project, follow these steps:
- Download the library from the GitHub repository.
- Go to Sketch > Include Library > Add .ZIP Library in the Arduino IDE.
- Select the downloaded
.zipfile and click Open to add the library to your project.
- Open Arduino IDE.
- Go to Sketch > Include Library > Manage Libraries.
- In the Library Manager, search for each of the following libraries and click Install:
- WiFi: For connecting the ESP32 to a Wi-Fi network.
- ESPAsyncWebServer: For handling web server functionalities asynchronously.
- AsyncTCP: A required library for
ESPAsyncWebServerto function correctly. - FS: Filesystem support for the ESP32.
- SPIFFS: SPI Flash File System for the ESP32 to store and serve files.
- ArduinoJson: For working with JSON data, useful in web applications.
- EEPROM: For reading and writing data to the EEPROM on the ESP32.
Once you have completed these steps, you are ready to start using the library in your ESP32 project!
To upload website files stored in the data folder to ESP32’s SPIFFS, follow these steps:
- Check if the
toolsfolder exists:- Navigate to:
Documents/Arduino/ - If there is no
toolsfolder, create one.
- Navigate to:
- Paste the downloaded
ESP32FSfolder insidetools:Documents/Arduino/tools/ESP32FS/tool/esp32fs.jar - The file structure should be like this-

- Close and reopen Arduino IDE.
- Now, you should see "ESP32 Sketch Data Upload" under the Tools menu.
- Open your project in Arduino IDE.
- Click "ESP32 Sketch Data Upload" in the Tools menu.
- Wait for the upload to complete.


✅ Now, your website files in the data folder are stored in ESP32’s SPIFFS! 🚀
If you plan to use EEPROM in your project, please note the following restrictions:
- The EEPROM address range 0 to 110 is reserved for the library’s internal use.
- You must not use this range for your own data.
- The remaining EEPROM addresses (from 111 onward) are available for you to use freely.
Ensure that you avoid using addresses 0 to 110 in your EEPROM operations to prevent conflicts with the library’s settings and functionality.
This example demonstrates controlling an LED on pin 2 of the ESP32 using a button from this WebSocket-based controller.
- Open Arduino IDE.
- Go to File > Examples > WebController > led_control.
- Upload the code to your ESP32.
- The ESP32 connects to WiFi and listens for button presses from the web interface.
- The LED on pin 2 is controlled as follows:
- If the button is configured as a push button in the settings, it will turn ON when pressed and OFF when released.
- If the button is configured as a toggle button, pressing it will toggle the LED state (ON/OFF), keeping the state until the button is pressed again.
- Open Serial Monitor in the Arduino IDE (Tools > Serial Monitor).
- Make sure Autoscroll is turned off.
- Press the EN (Enable) button on the ESP32 to reset it.
- Once the ESP32 connects to WiFi, the IP address will be displayed on the Serial Monitor.
- Copy the displayed IP address.
- Open your browser and paste the IP address into the URL bar to access the WebController interface.
Below is a Video showing how the button controls the LED:

This project is licensed under the Creative Commons Attribution-NonCommercial 4.0 International License (CC BY-NC 4.0).
You are free to:
✔️ Share — Copy and redistribute the material in any medium or format.
✔️ Adapt — Remix, transform, and build upon the material.
Under the following terms:
🚫 NonCommercial — You may not use the material for commercial purposes.
For full license details, see the LICENSE file.
